Project begins: March 2021
Video storyboard: https://youtu.be/fJkH7wo3lgE
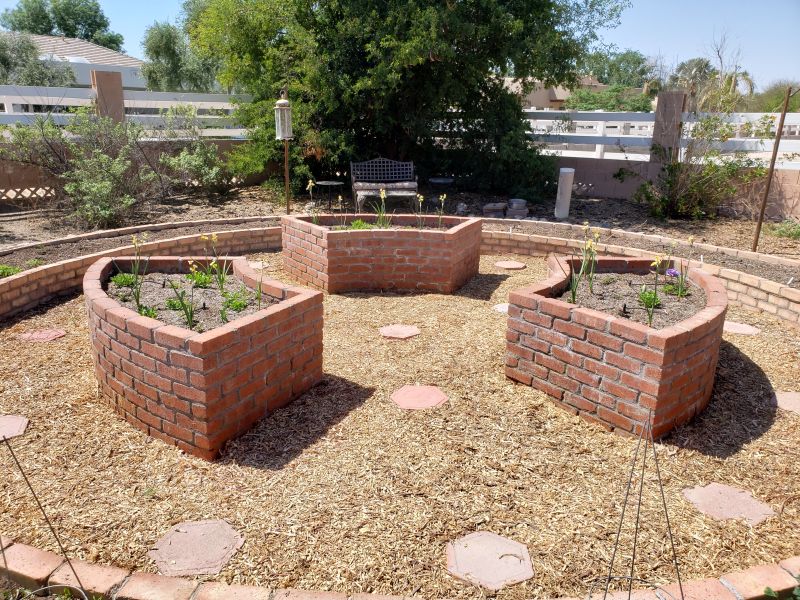
In December 2020, I completed the Garden Augment project. The empty space in the center bothered me but there didn't appear to be enough space to put anything there.
I was thinking of planting a tree but I didn't want the tree's roots screwing with all the irrigation installed underneath. After considering solutions for providing local critters with a source of water during the hot weather, I arrived at a solution that solved both problems. A tall, skinny fountain with an underground reservoir would not take up too much space.
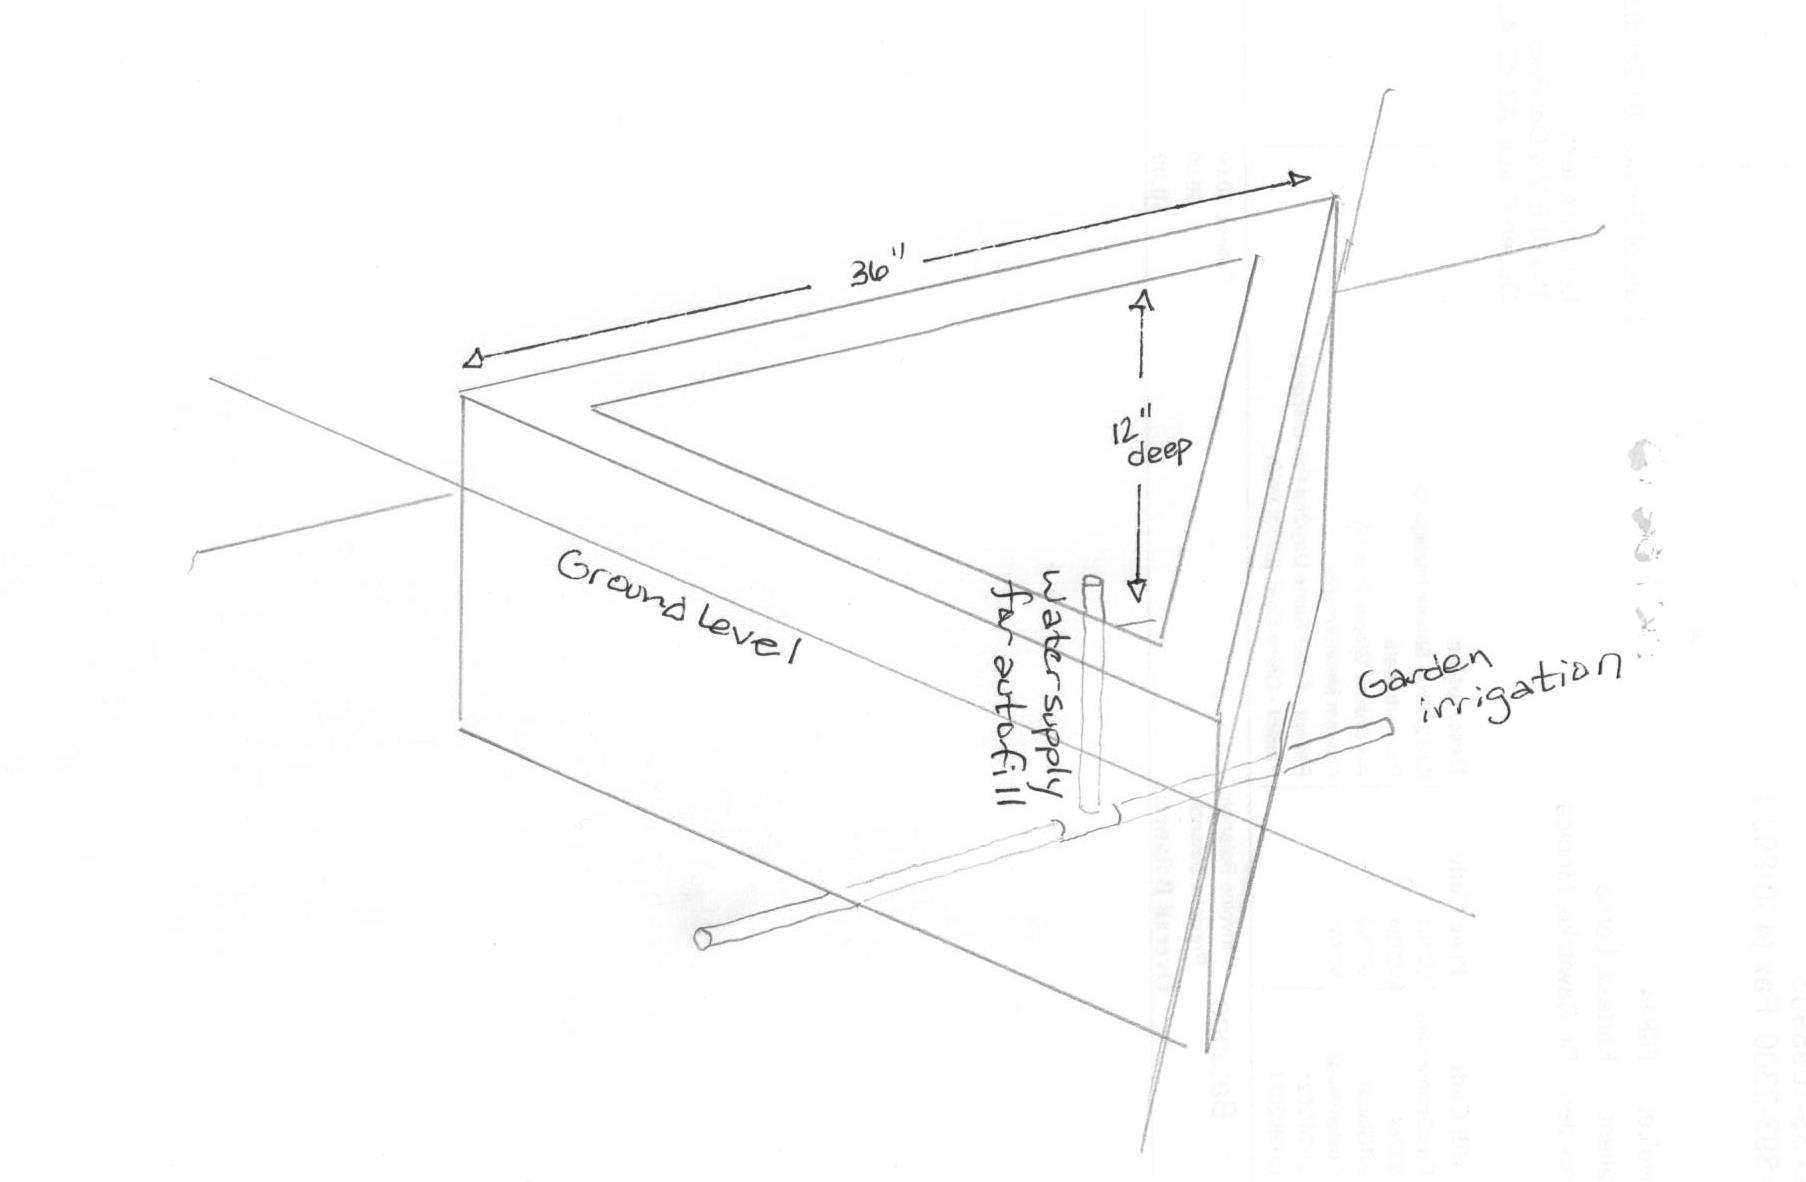
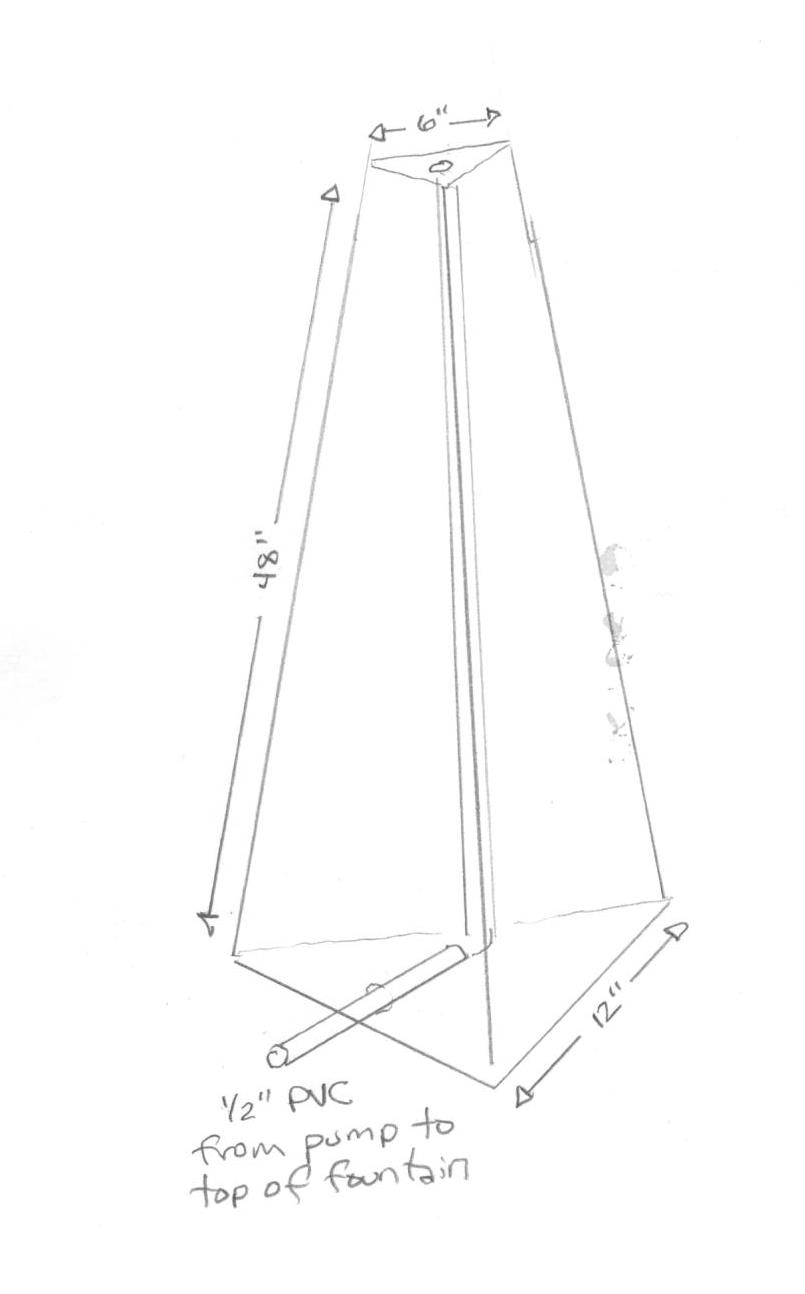
The first part of the project is to figure out what kind of fountain to build. Because I designed the garden geometry in thirds, a fountain with three faces would work best. Before I start thinking about that, I needed to build a below-ground reservoir. At first I was going to build a rectangular reservoir but the shape wouldn't have worked with the garden geometry. The solution was a triangular reservoir. The following is the conceptual design prior to construction. Most of it is under ground, since the feature is the fountain rather than the basin. Including water displacement from the base of the pyramid, the reservoir will have an approximate 20-gallon capacity.
The actual construction begins, which involved excavating down about 18 inches down and reconfiguring the garden irrigation to accommodate the reservoir.
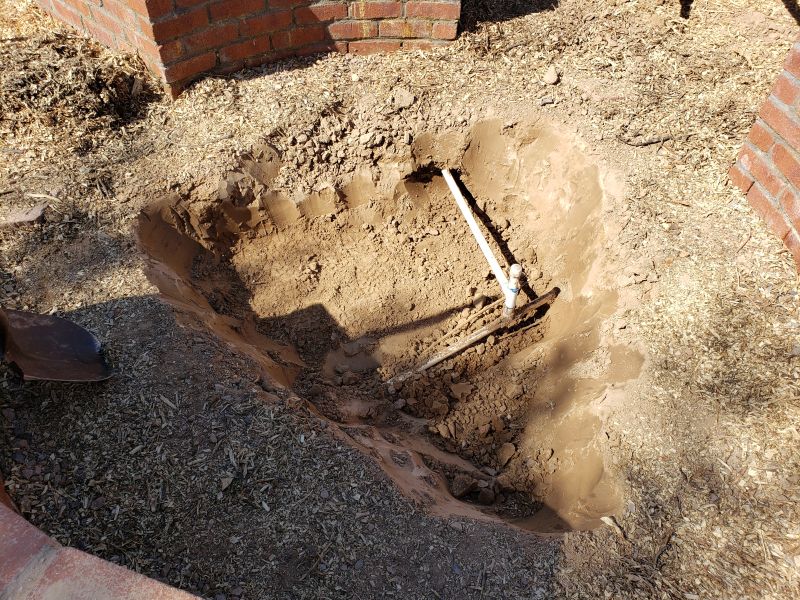
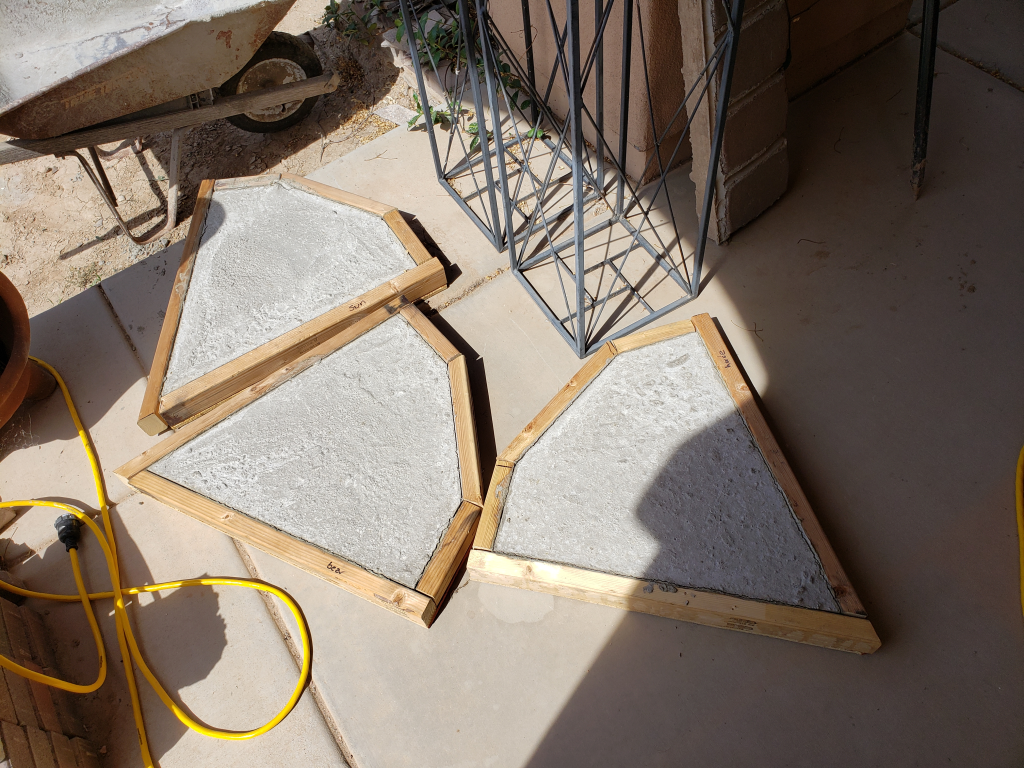
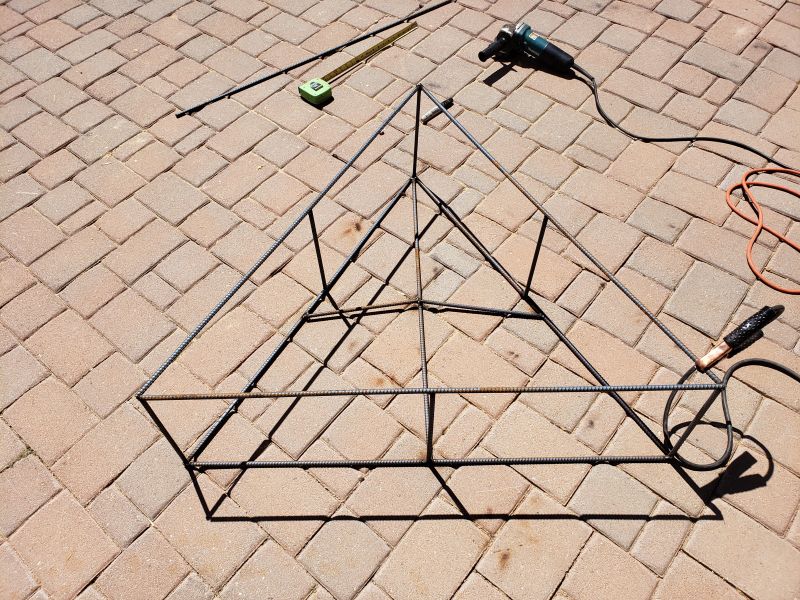
I have seen plastic reservoirs but that would be a poor choice here with the desert heat so I made one out of concrete. I built the inner and outer concrete forms with reinforcement on the sides to discourage bowing.

For reinforcement, I usually wing it with baling wire to attach all the rebar together but because of the close quarters of the outer and inner form walls, I fabricated a drop-in rebar frame to make sure that the reinforcement stayed put while the concrete was poured.
After dropping in the outer wall and rebar frame, the first concrete pour is the floor of the reservoir.
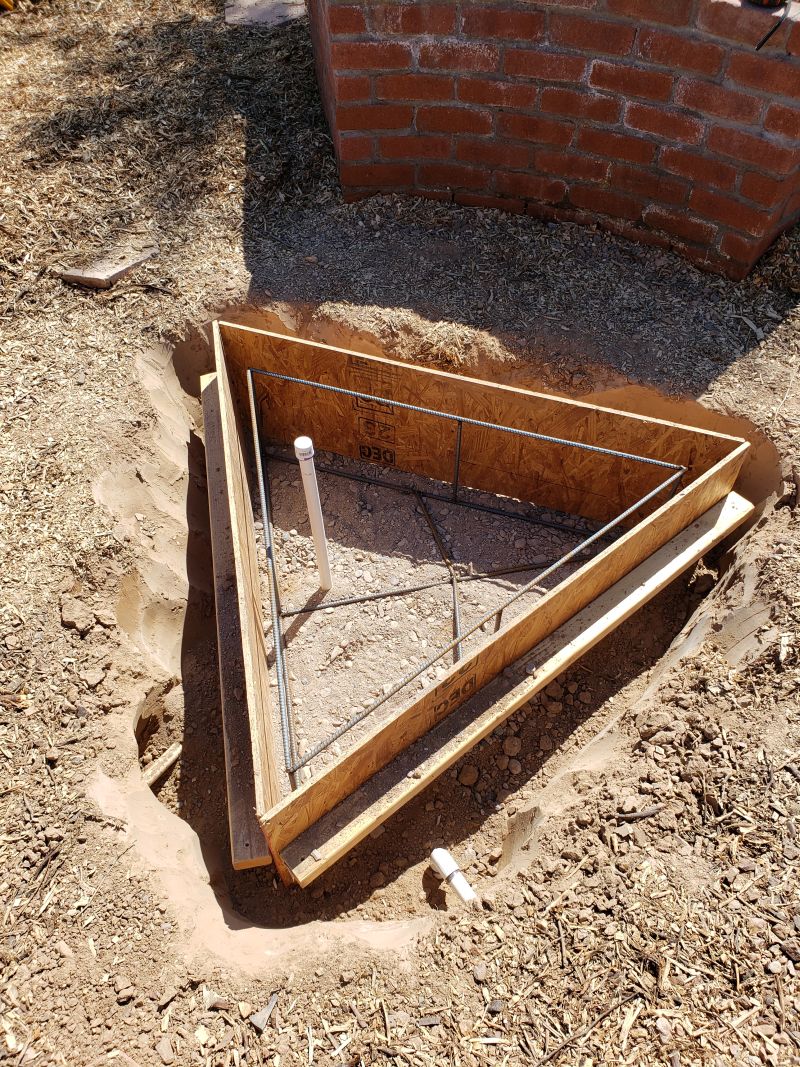
The inner wall sits on the newly-poured floor.
Mistake #1: I made a miscalculation with the positioning of the auto-refill pipe, not considering that it would hit the anti-bowing reinforcement in the inner wall. I had to remove one of them and it is evident from the bowing of the un-reinforced inner wall. It became a problem because it deformed one of the walls, allowing for a micro-leak that I ended up having to patch later.
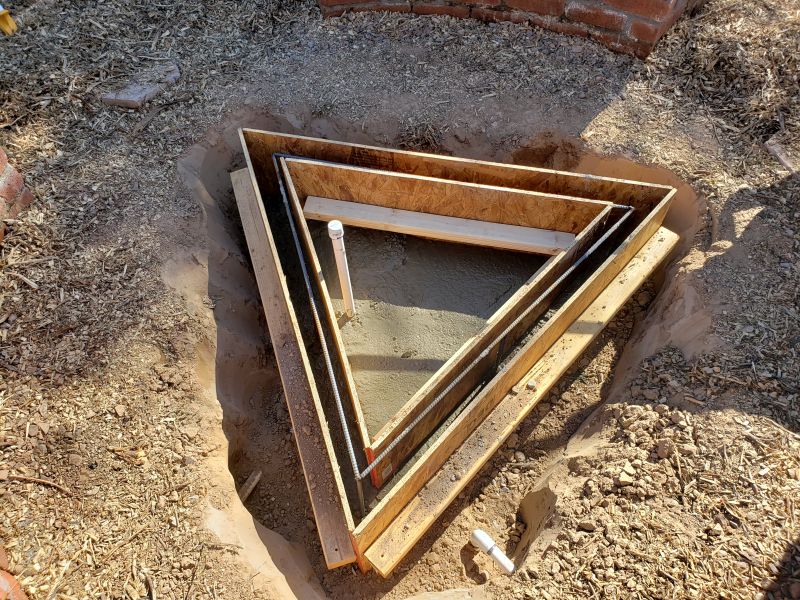
Mistake #2: Always secure the forms to reduce the chance that they will move when concrete is being poured. In this instance, while pouring the concrete, the inner form scooted about 1/2 inch in, contributing to aforementioned micro-leak.
Mistake #3: After pouring the floor, the inner form is placed on top of the floor concrete, then the walls are poured. The problem was that the inner form sank about 1/2" into the floor concrete and was a gigantic pain in the ass to remove after the concrete cured. Removal involved smashing the inner form into splinters and chiseling the stuck pieces of form wood from where it had sank into the concrete. A better solution would have been to secure the inner form from the top, preventing its sinking into the floor concrete.
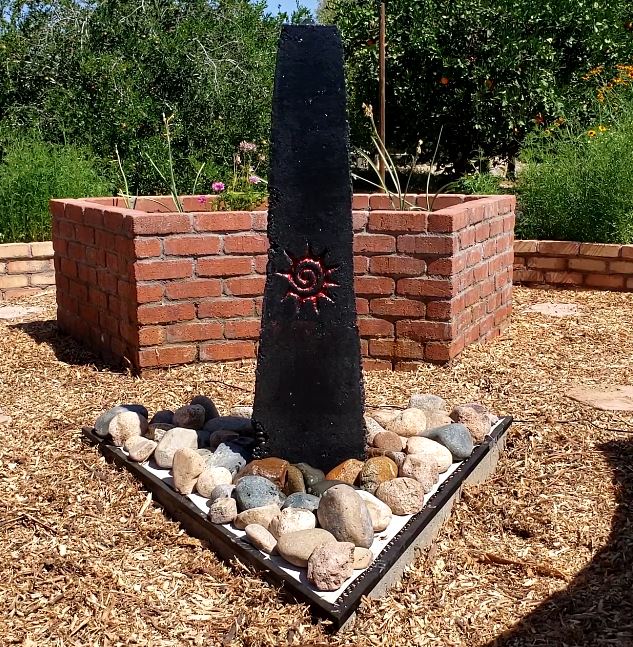
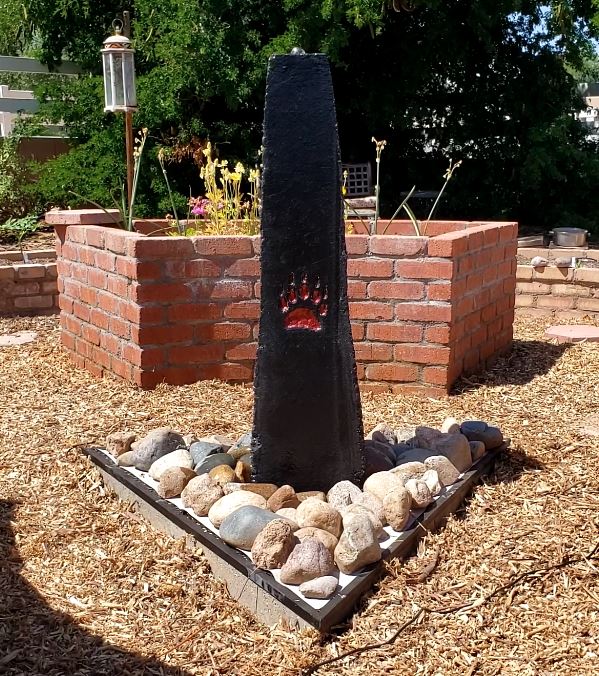
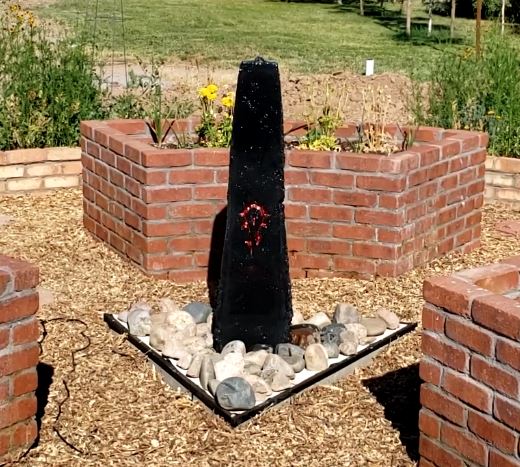
While the concrete sets, I set to work on the fountain. My idea was to have a tall, skinny, three-sided pyramid with a truncated top. I wanted a pyramid shape to lower the center of gravity so that the fountain was less likely to be knocked over when set into the reservoir.
I looked at a lot of fountains at the local statuaries but they were all oppressively expensive and none had the shape that I was looking for. Better to build my own. First, acquire the parts.
 |
 |
 |
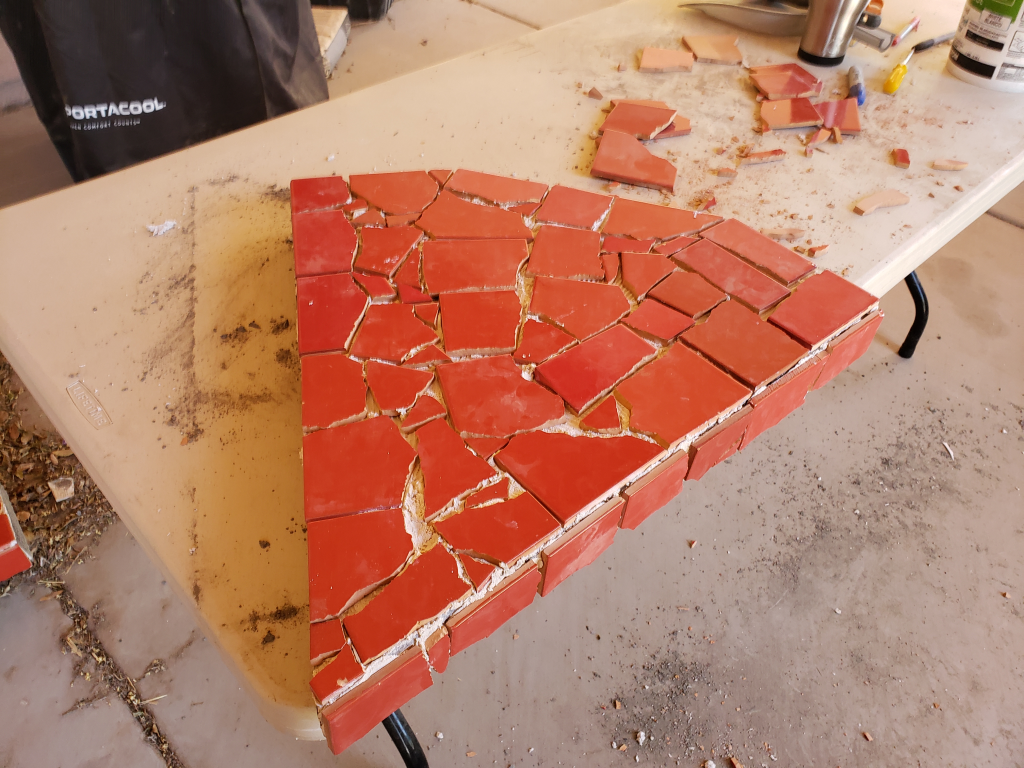
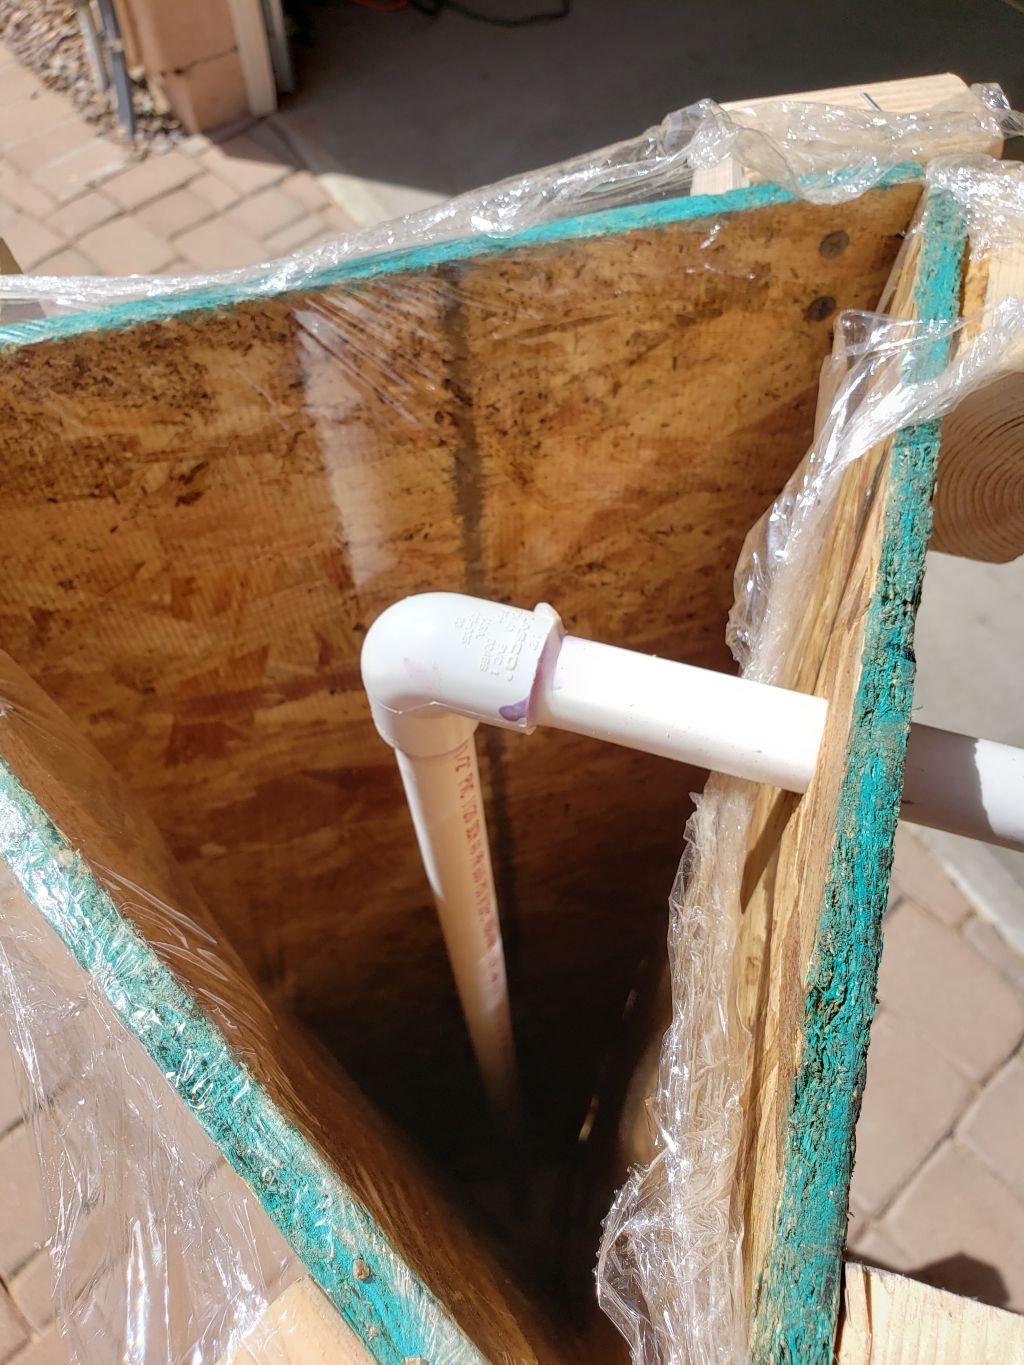
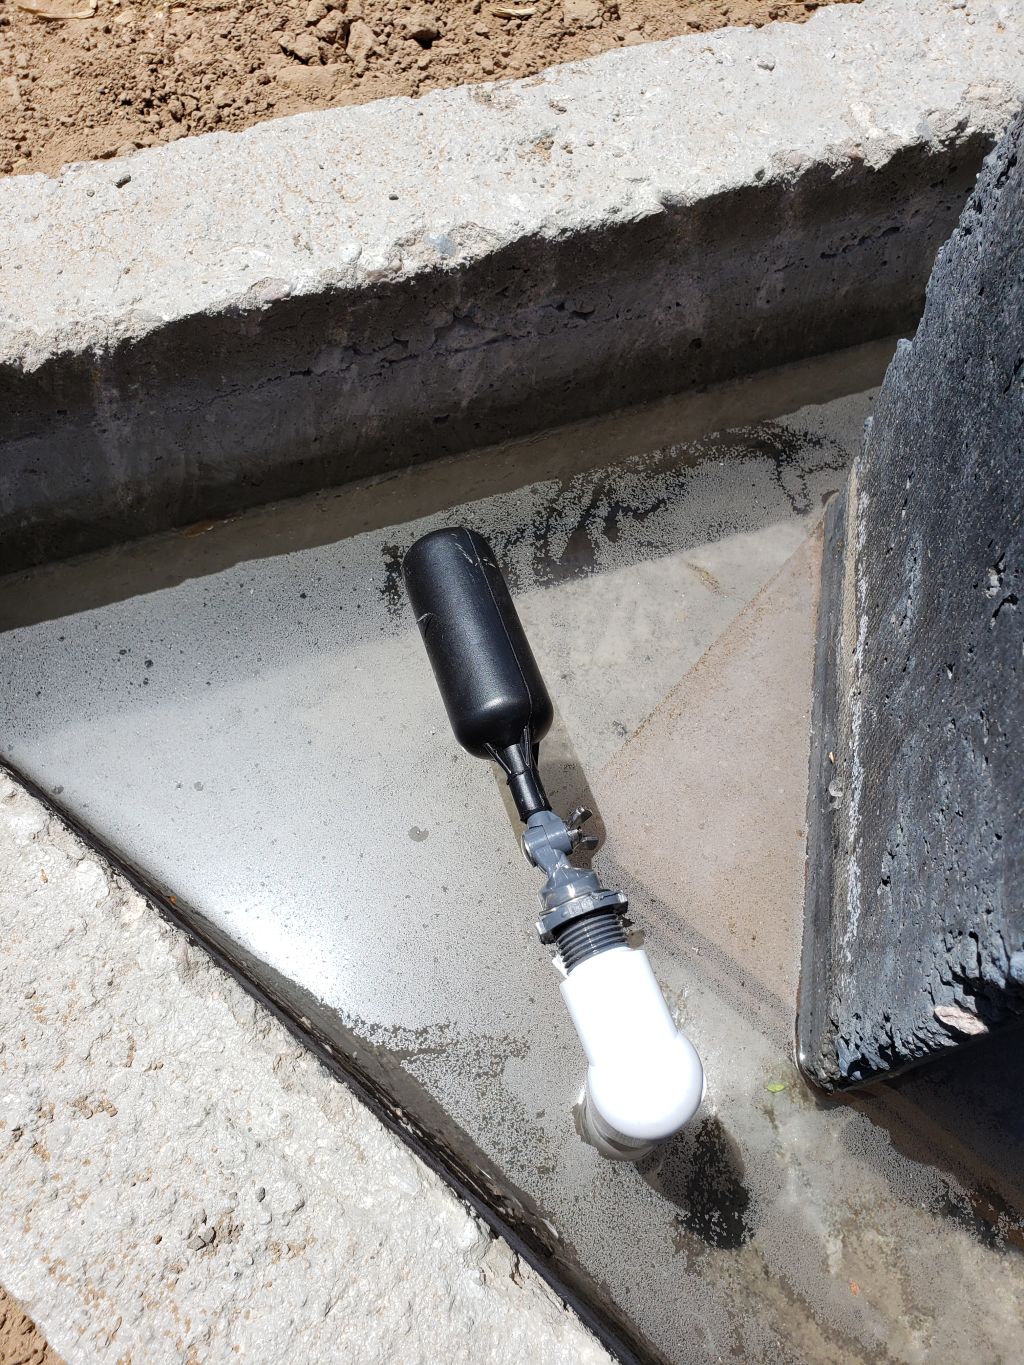
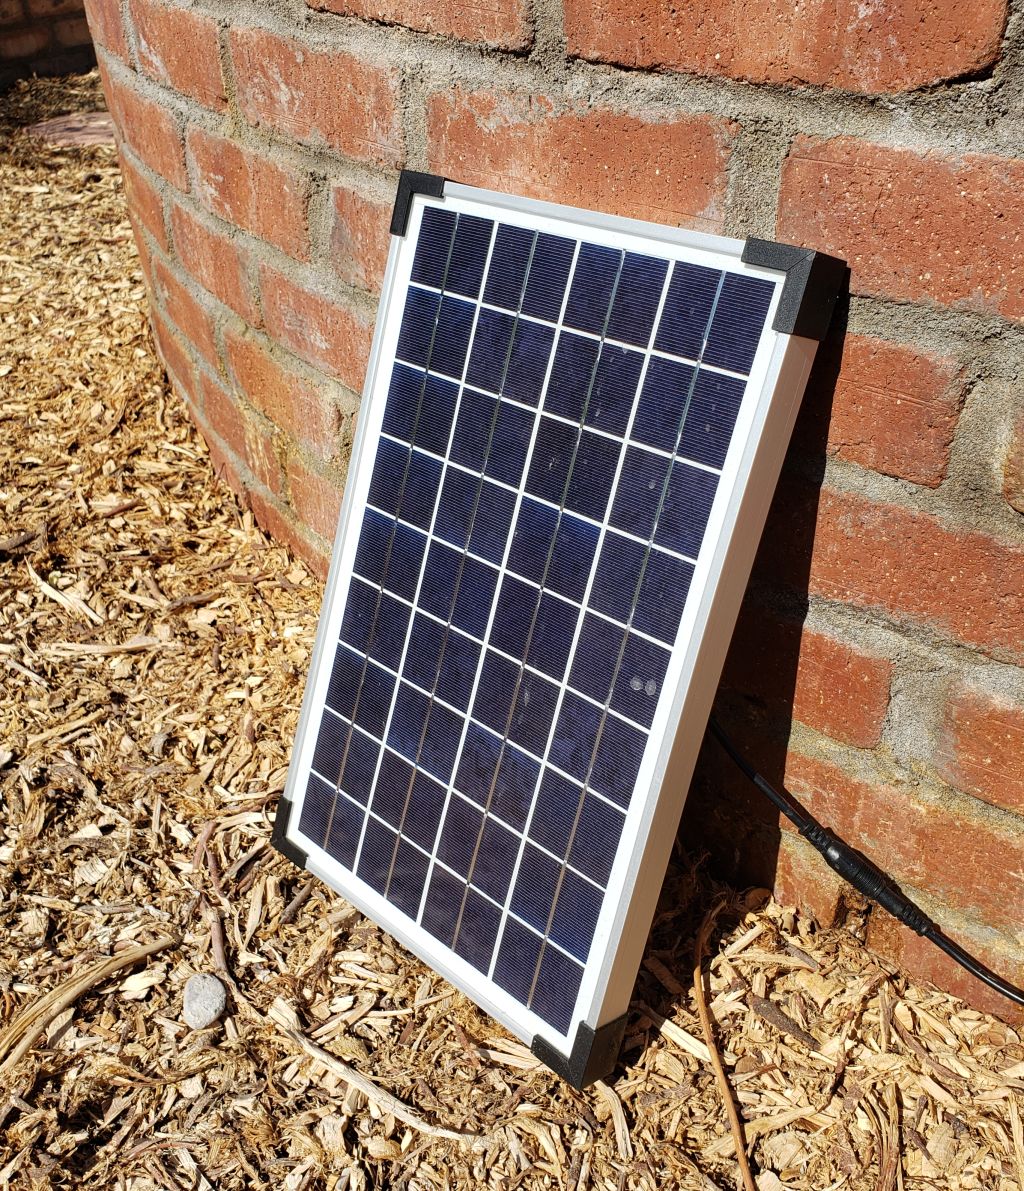
| The auto-refill float kicks on once a day when the garden irrigation turns on to replace water lost to evaporation. | Because I don't want to run power out to the garden, the next best solution is to buy a solar-powered fountain pump. Nobody visits the garden at night so there is no need to have the pump running constantly. Water is pumped through a PVC pipe set into the cast concrete, where it bubbles out of the top and cascades down the sides of the pyramid. | Another good reason not to purchase a
fountain as most of the concrete ones are plain
concrete with no character. I chose a deep back
dye to create a World of Warcraft "Horde" look. |
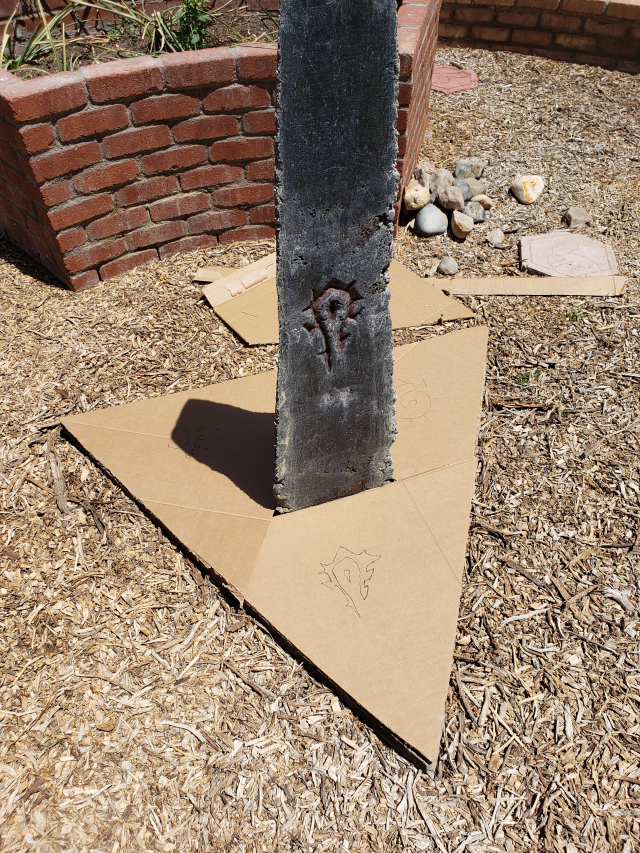
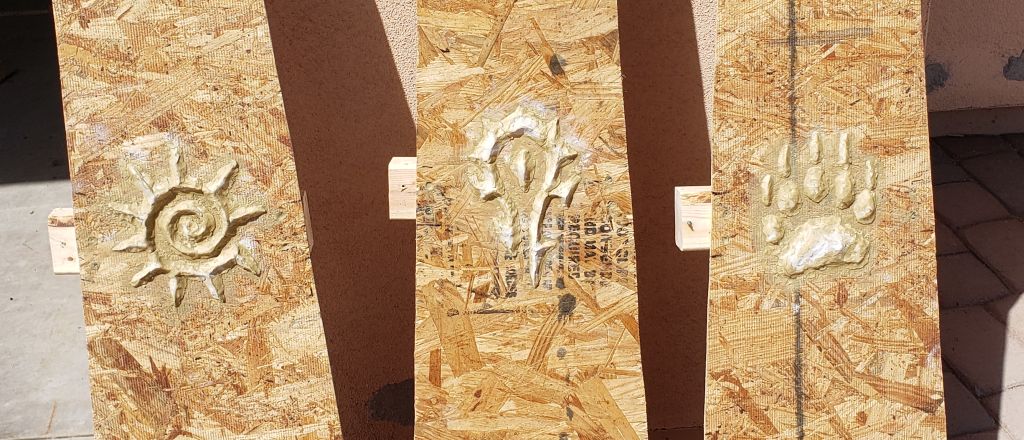
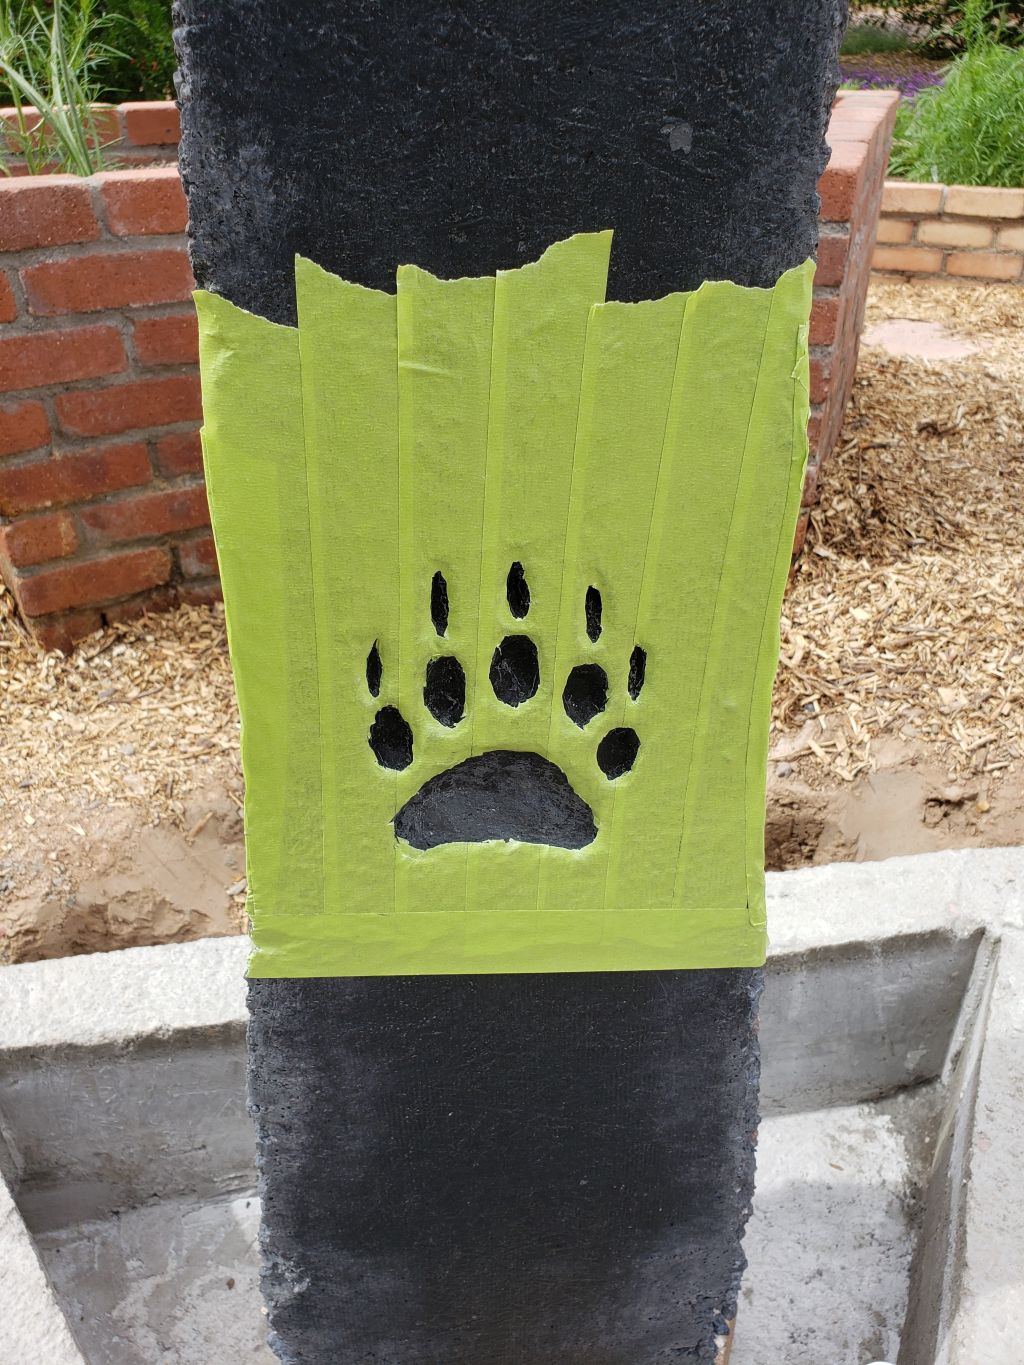
Before I start building the forms for the fountain, I wanted to create a prototype of an idea that I had. I like the idea of concrete imprinting, where something is pressed into the newly-poured concrete to give it character. Animal paw prints and leaves are commonly used to do this. What I have never seen done is drawing a design into a concrete form that transfers to a negative imprint in the concrete when the forms are removed. I used an old stepping stone mold and some modeling clay for the design.
Mistake #4: I didn't notice it at the time but the imprint is a mirror image of the design. Most of the time this isn't going to be an issue unless you are trying to spell something or create a design that is going to look odd in reverse.
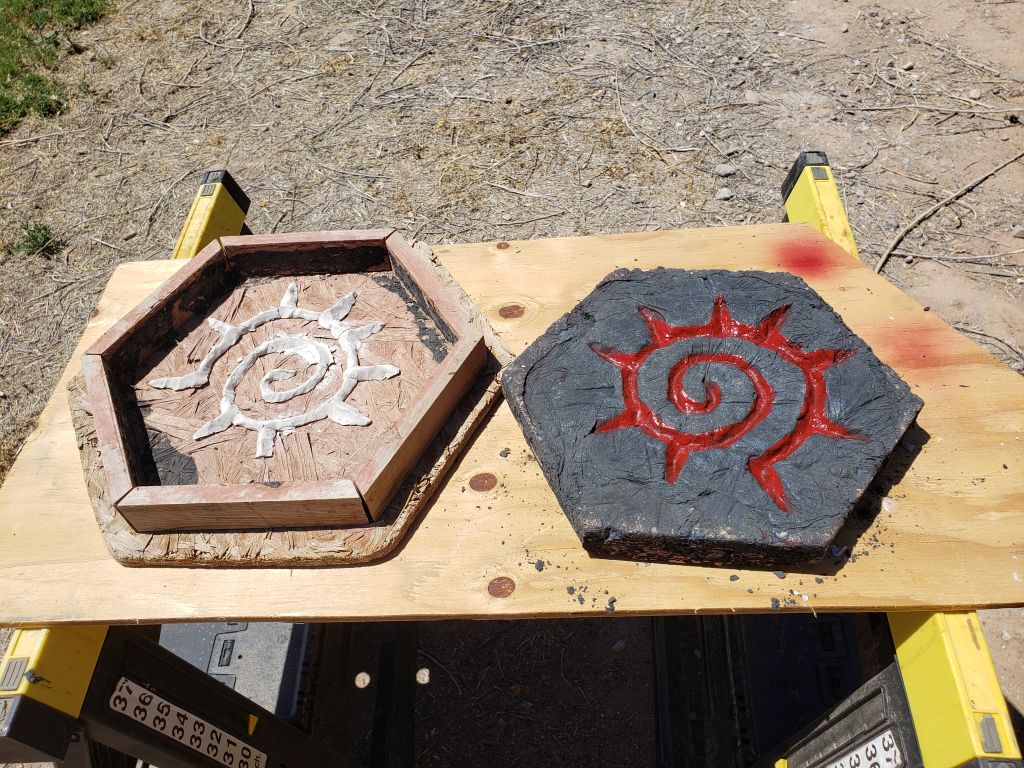
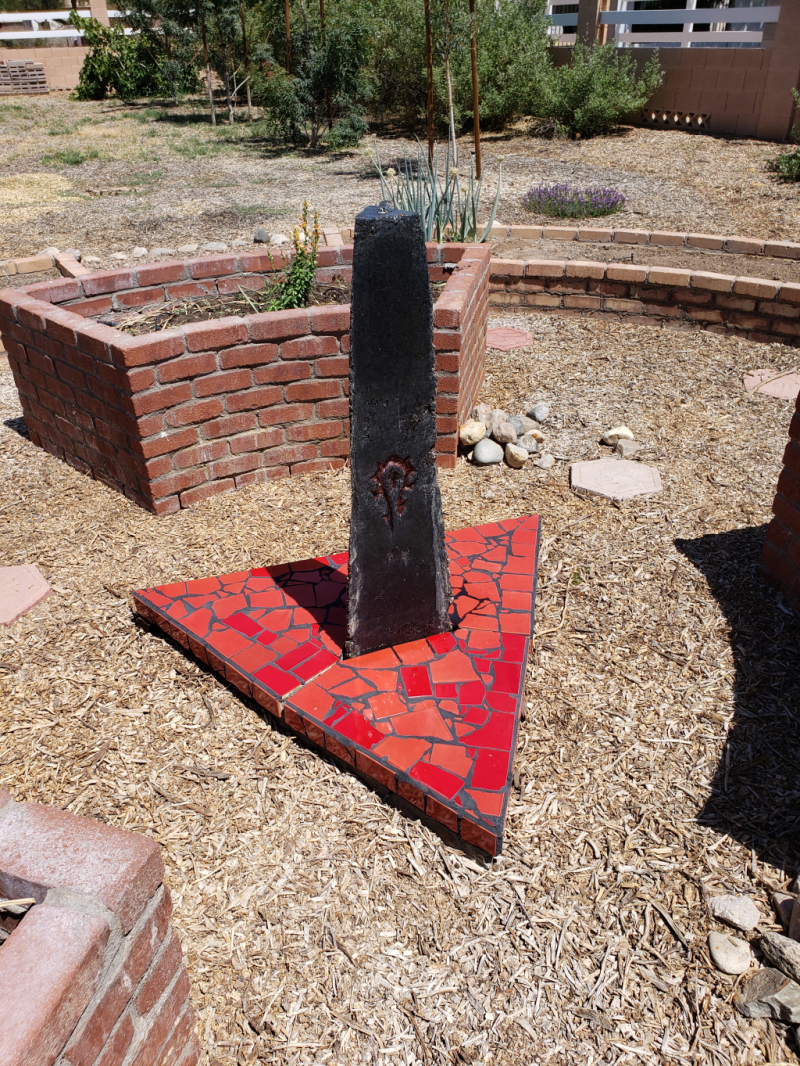
After cutting the forms, I used modeling clay and wood epoxy to secure the designs. The ones on the ends are Southwest Native American designs but the center is the Horde symbol from World of Warcraft.
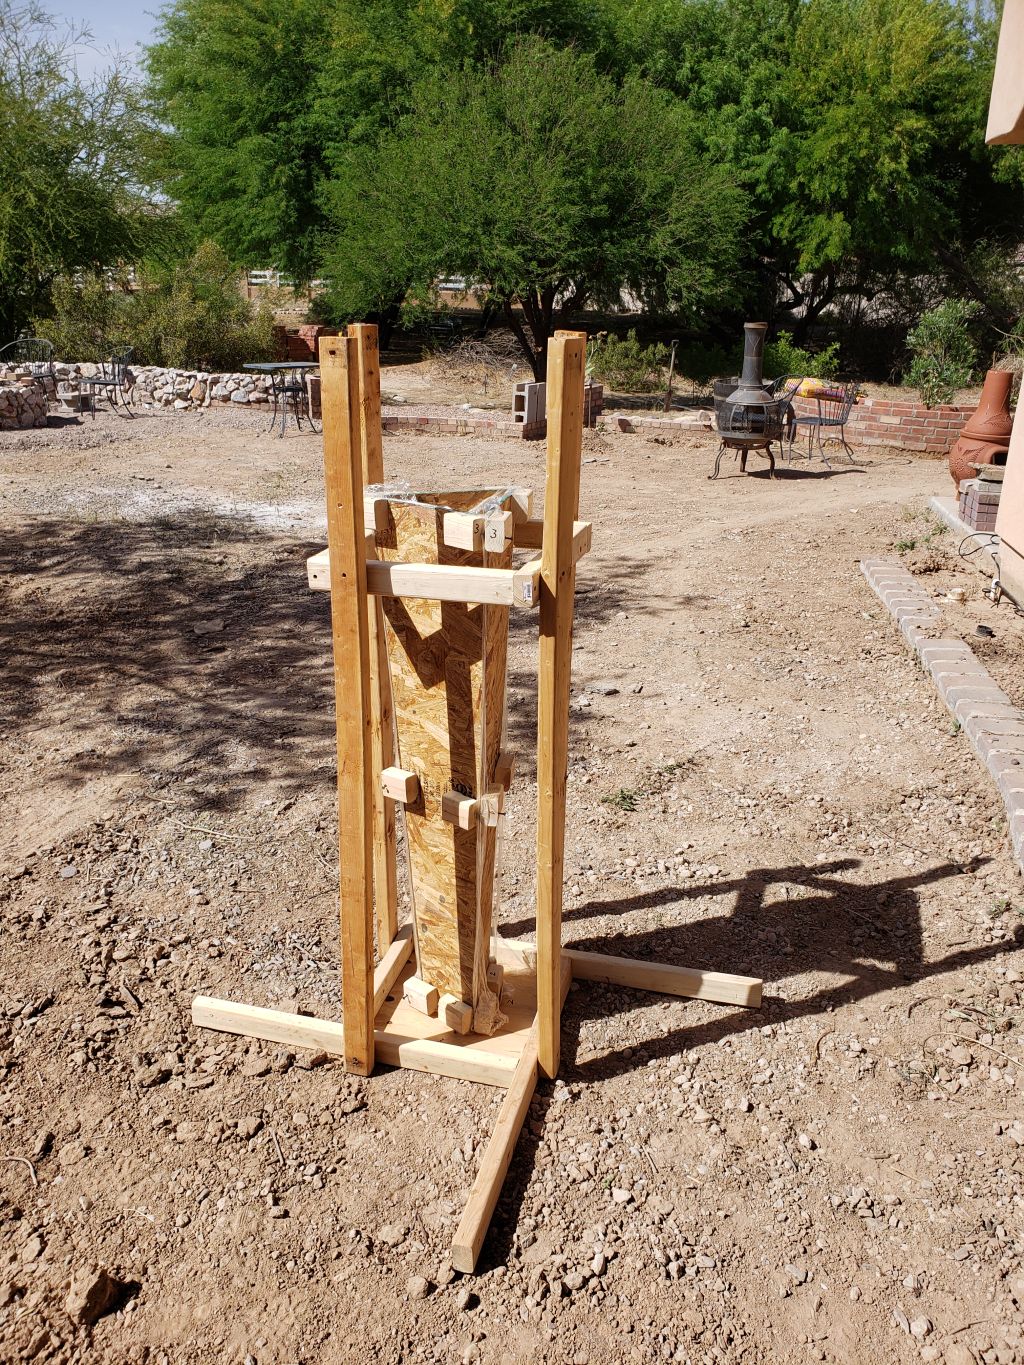
Because I have to pour concrete from the bottom, I built a scaffold so that it won't fall over while the concrete cures.
Mistake #5: The scaffold was a joke. This thing was so top-heavy that a strong wind would have knocked it over, scaffold and all. Fortunately, there wasn't any strong wind during the cure. A better solution would have been to secure the scaffold to the ground as is done with transplanted saguaros.
Before the concrete pour, I installed some 1/2" PVC for the fountain pump to pump the water to the top of the fountain.
Mistake #6: I secured the three panels together with pieces of 2x3 along the edges. It looked as if this would be sufficient to hold the pieces together but it was not. While pouring the concrete, the pressure of the concrete flexed anything out that wasn't secured, resulting in bulges of concrete squiring out the edges. A better solution would have been to run 2x3s along the entire edge of the panel with more screws to discourage pressure damage.
Mistake #7: While pouring the concrete, I should have been more mindful of the edges. There were a few voids where concrete failed to fill in.
Despite the mistakes, I wasn't disappointed with how it ended up after removing the forms. I knocked all the edge-squirty concrete off with a hammer, which gave the edges a rough look, kind of like something you would find at an Orcish temple. After three days of curing, it was moving day. The final product ended up weighing around 300 lbs, which required a ride to the garden with a hand truck.

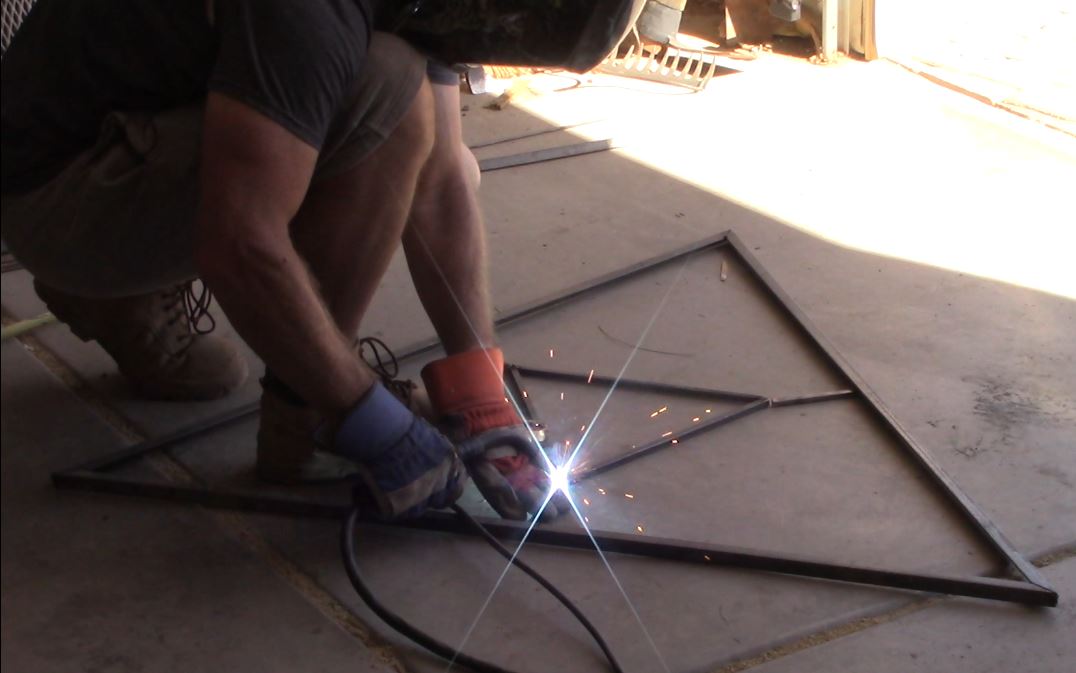
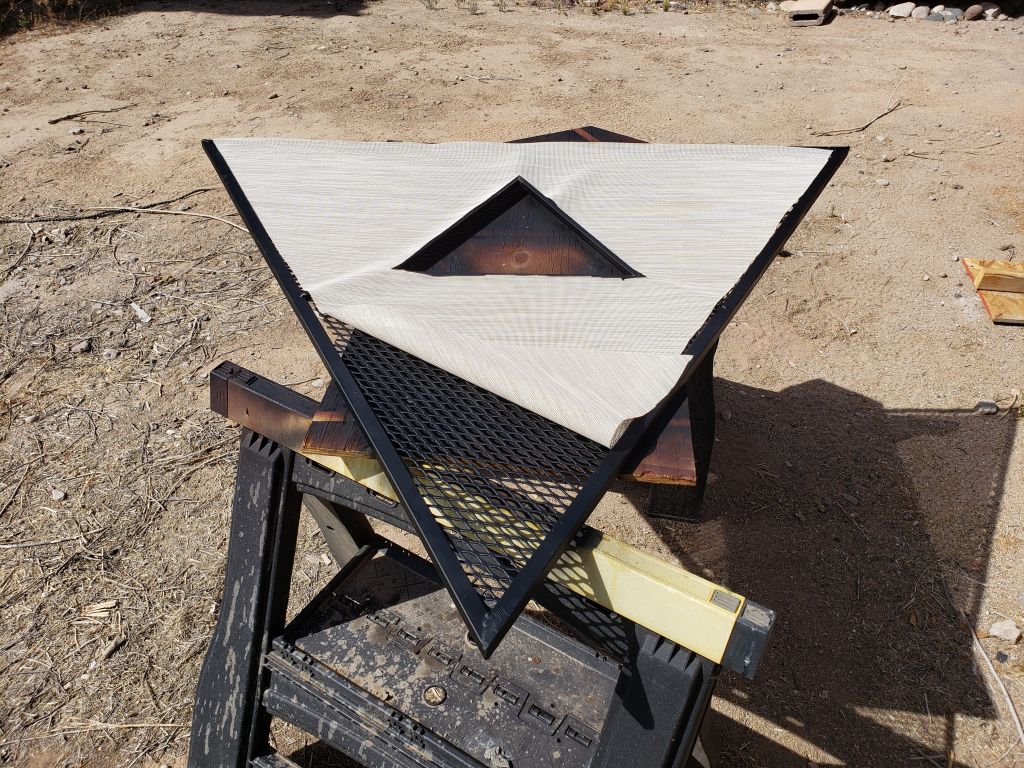
The next step was to fabricate a lid for the reservoir with an opening in the center for the pyramid. The idea is to have a removable cover on which river rocks can be placed to discourage larger pieces of debris from falling in the fountain.
Final touch for the lid is a shroud, made from sunscreen fabric, to keep smaller debris out of the fountain.
After getting some assistance moving the pyramid into place in the reservoir, I masked off the face designs for painting. The idea was to give the designs some color because the impressions otherwise may not be as noticeable.
Before filling the reservoir, I installed the auto-fill float. This is connected to the garden water supply but is only supplied with water once a day when the garden is being watered.
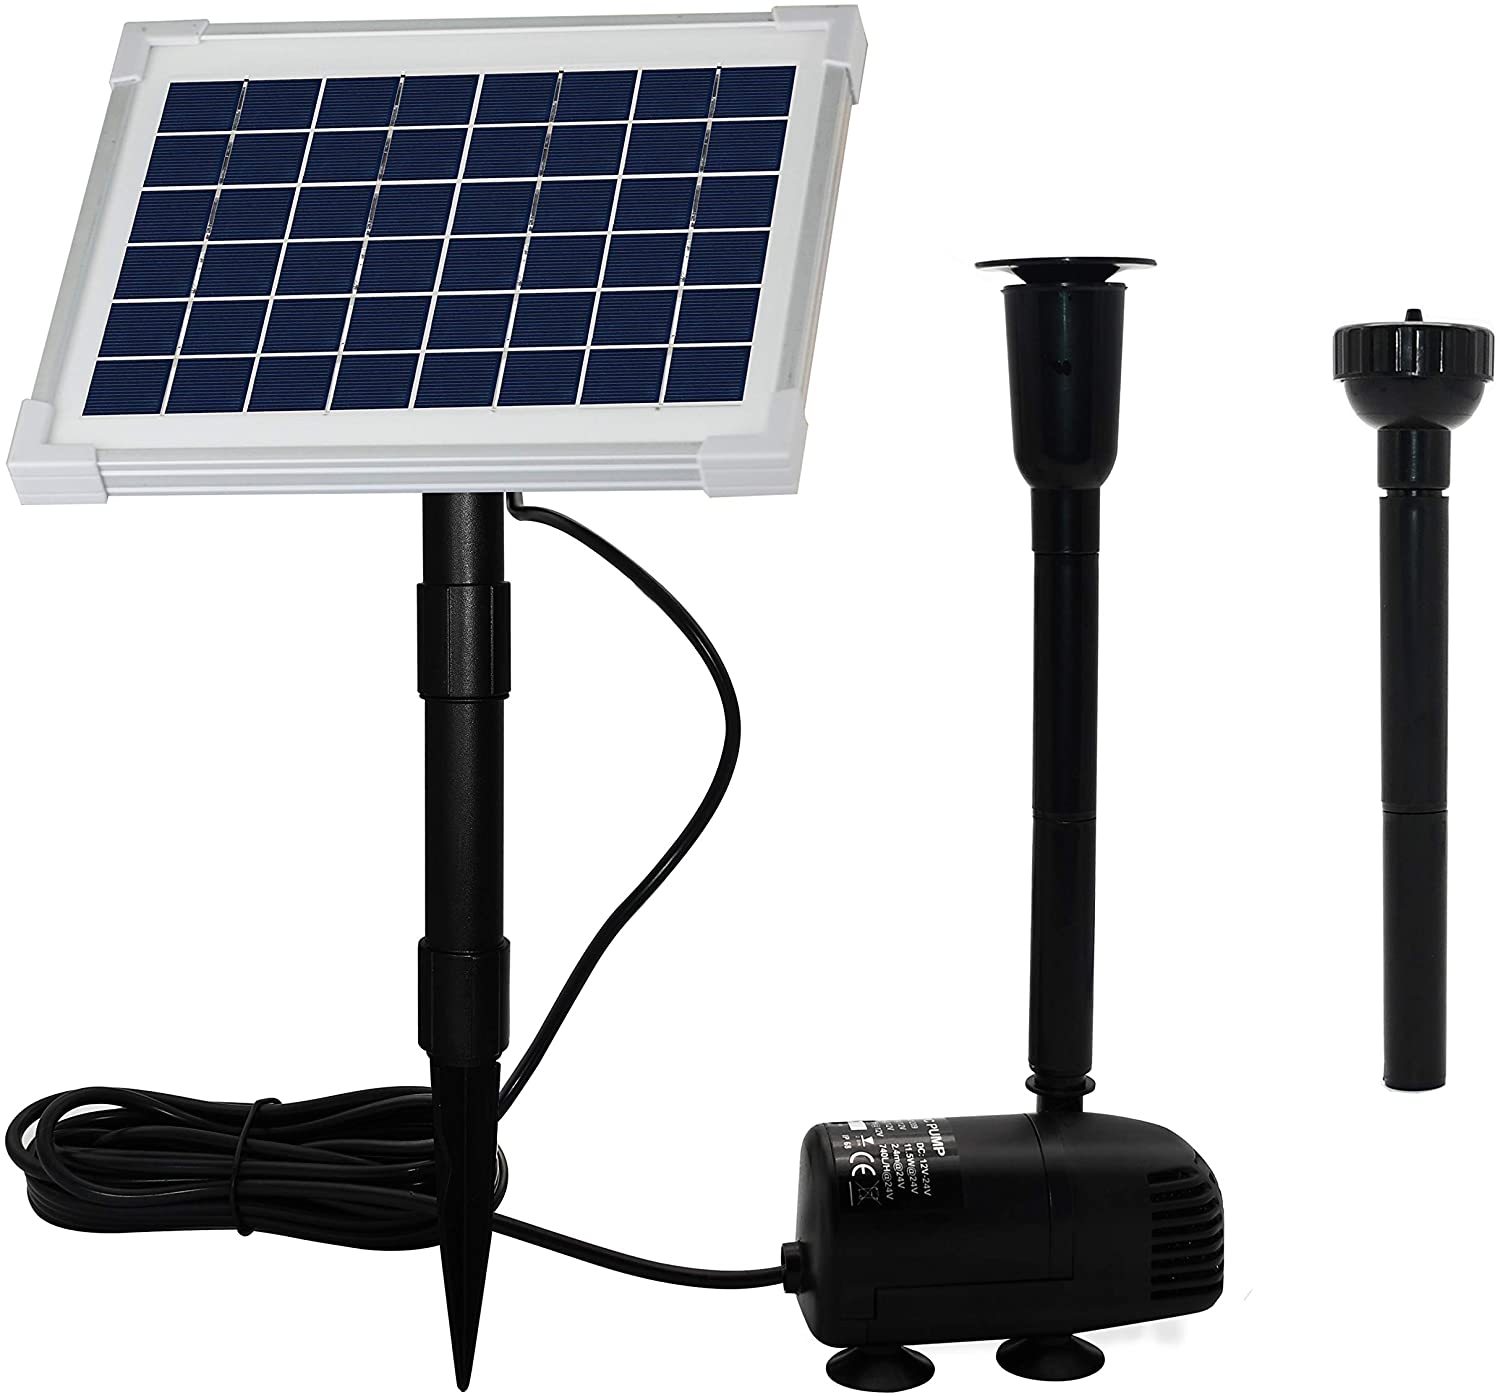
Mistake #8: When selecting a fountain pump, pay attention to the Max Lift Height specification. Initially I had chosen a pump with a max lift height of 2'9'' and shouldn't have been surprised that when I powered up the pump, it pushed the water up the length of the pyramid .. you guessed it, 2'9" .. just short of the top. The solution was to purchase the next more powerful pump with a max lift height of 5'6".
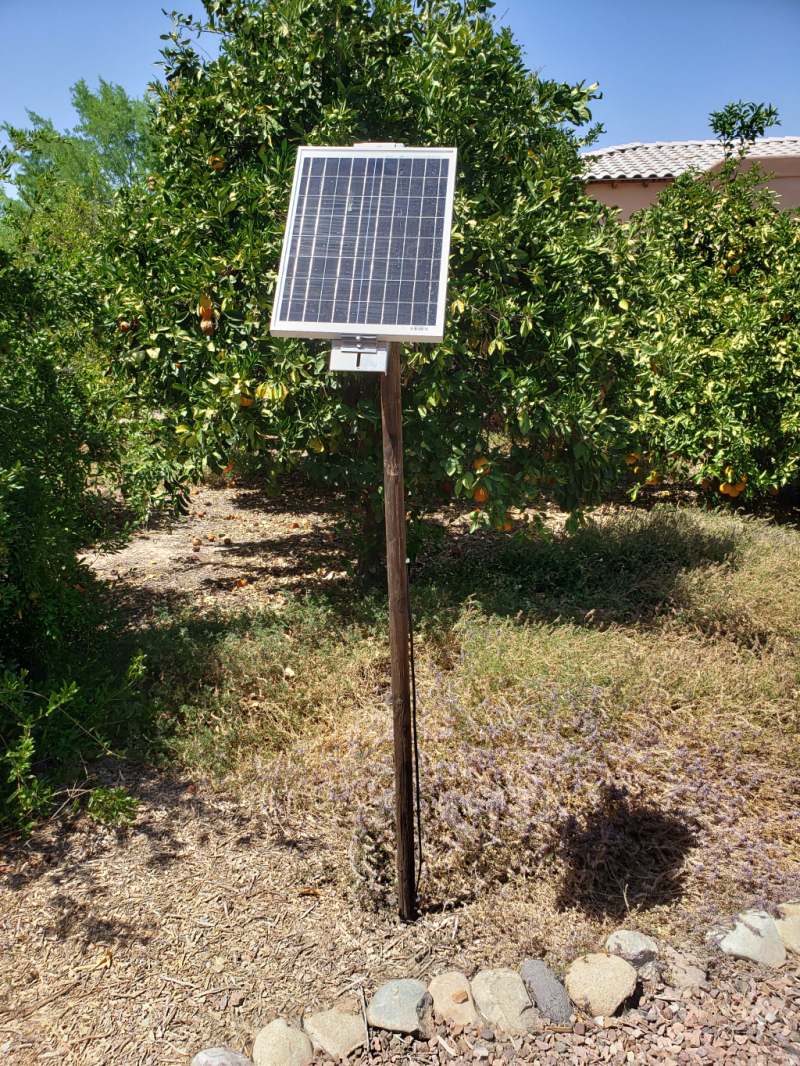
The new pump turned out to be exactly the same model as the old one; the only difference was a 20W solar panel vs the insufficient 10W panel that came with the first pump.
Placing the solar panel turned out to be problematic but not unexpected. There is no one point in the garden that gets full sunlight all day so I ended up fabricating a splitter cable to two solar panels; one pointed east and one pointed west, with some overlap from afternoon sun. This way, the fountain runs from morning to evening regardless of sun orientation.
Project completed: May 2021
 |
 |
 |
| Southeast
face |
Northeast
face |
West
face |