Project begins: Spring 2013
What can I say? I love pizza. My first job was at Peter Piper Pizza, where I worked for eight years. When I joined the military, I swore never to eat pizza again but that oath was short lived when on town pass during basic training, my first place to visit in San Antonio was a pizza place. Years later, I make pizza every weekend: the dough and marinara completely from scratch. The only thing that limits me from making a perfect, New York style pizza is a real pizza oven. Until now, I am limited to the piece of crap oven in my kitchen that I can only get to 500 degrees. Time to get busy!
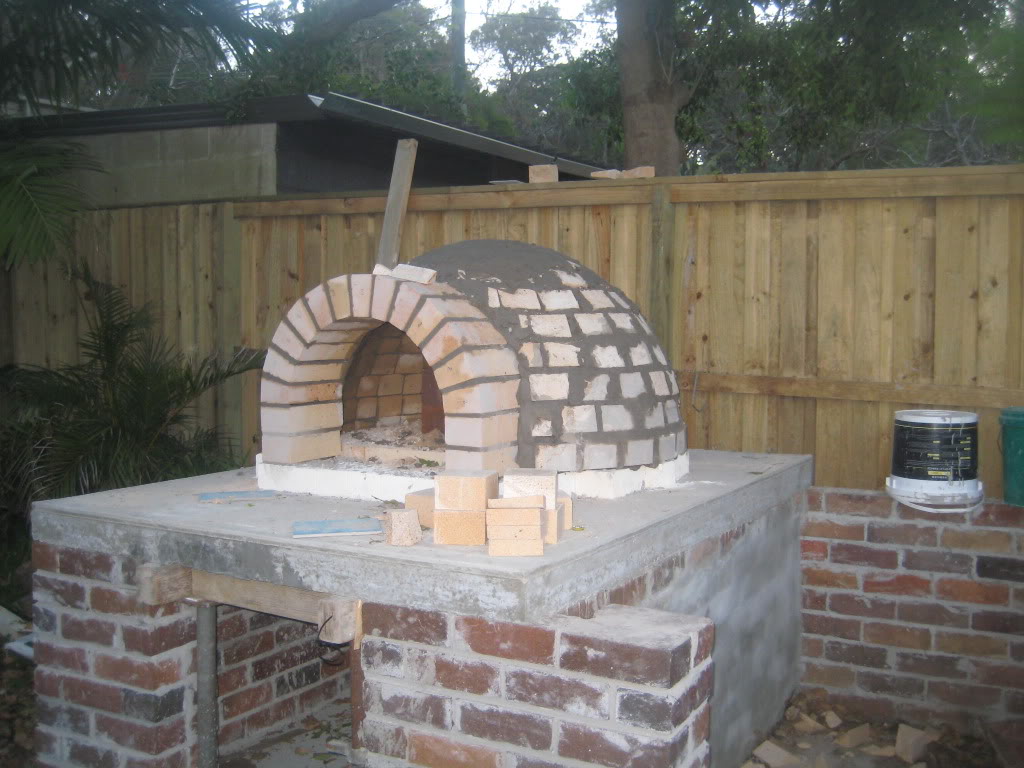
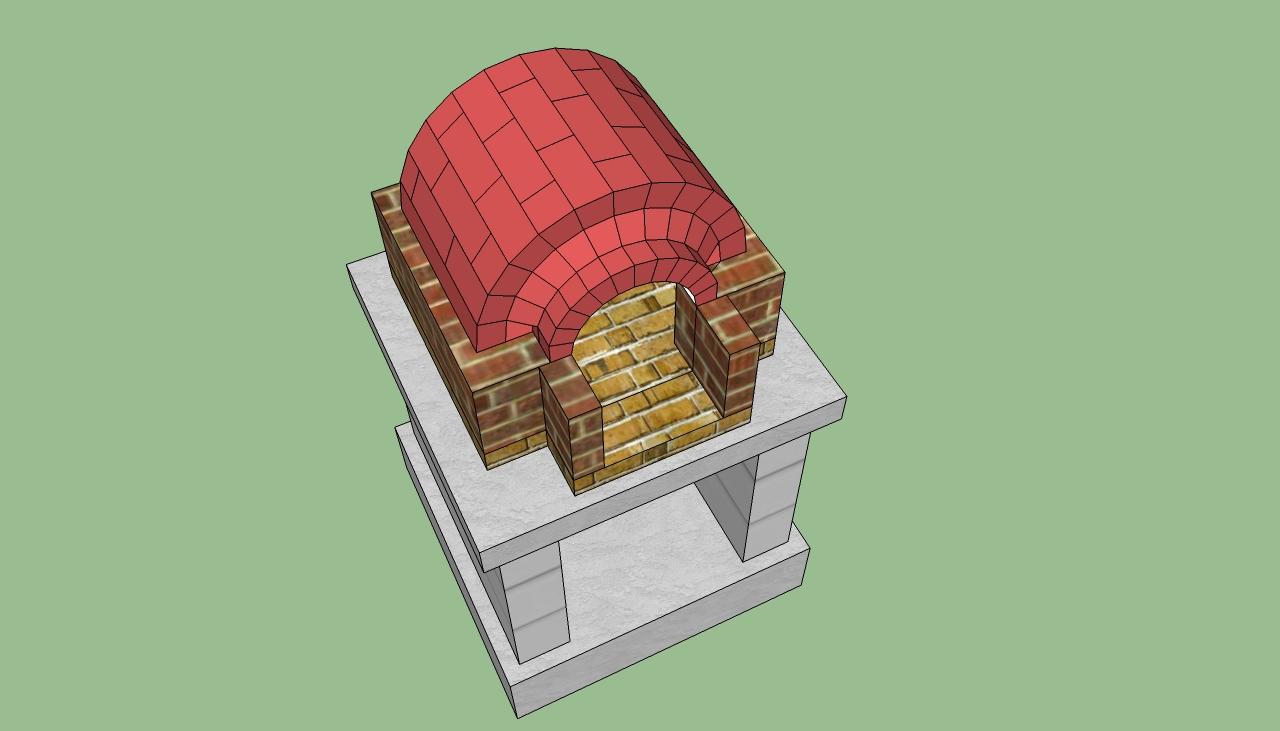
My first step in this project was to figure out what kind of oven to build. Two of the most common types are the Pompeii and the traditional "Tunnel" ovens. The Pompeii oven looks like an igloo and the Tunnel oven is a half-pipe with a flat back wall. There doesn't appear to be any advantage to one over the other; both perform equally as long as they are constructed properly. The overall design requirement is that the oven must withstand 1000 degrees F without damage, which means special attention to the materials used in construction.
 |
 |
|
Pompeii |
Tunnel |
The Tunnel design is used a lot in restaurants because they better accommodate high volume and heavy use. The Pompeii design is much older and less practical than the Tunnel but is the one that I decided to build because it just looks better.
In researching HOW to build the oven, I watched tons of YouTube videos that people who had built their own ovens had made. Most of the videos were not useful because they only showed pictures of the building process but they did inspire me for design ideas. The best video was actually a series of three videos by a fellow who goes by energysmartnh on YouTube. He narrated the video and described his choice of building materials and every step of the building process.
My first step was to choose a site to build the oven. In the Tuscan Veranda Project, I have always envisioned the space right off of the end of the back patio as the kitchen. Right now, this is where all of my portable grills are.
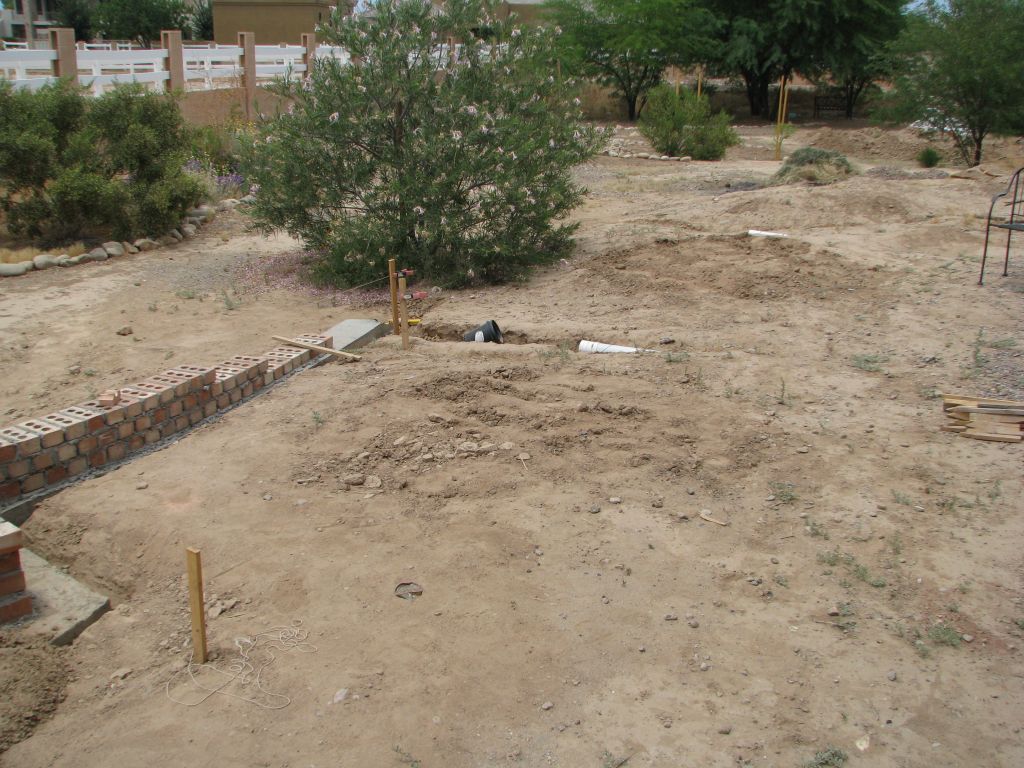
The completed oven is going to weigh several thousand pounds so I have to build a really sturdy foundation. Mine will be seven feet wide on both sides and six inches thick with half-inch rebar reinforcement spaced at about 18 inches. The rebar falls short of the edges by three inches to ensure that none of it will be exposed to oxygen after the concrete is poured.
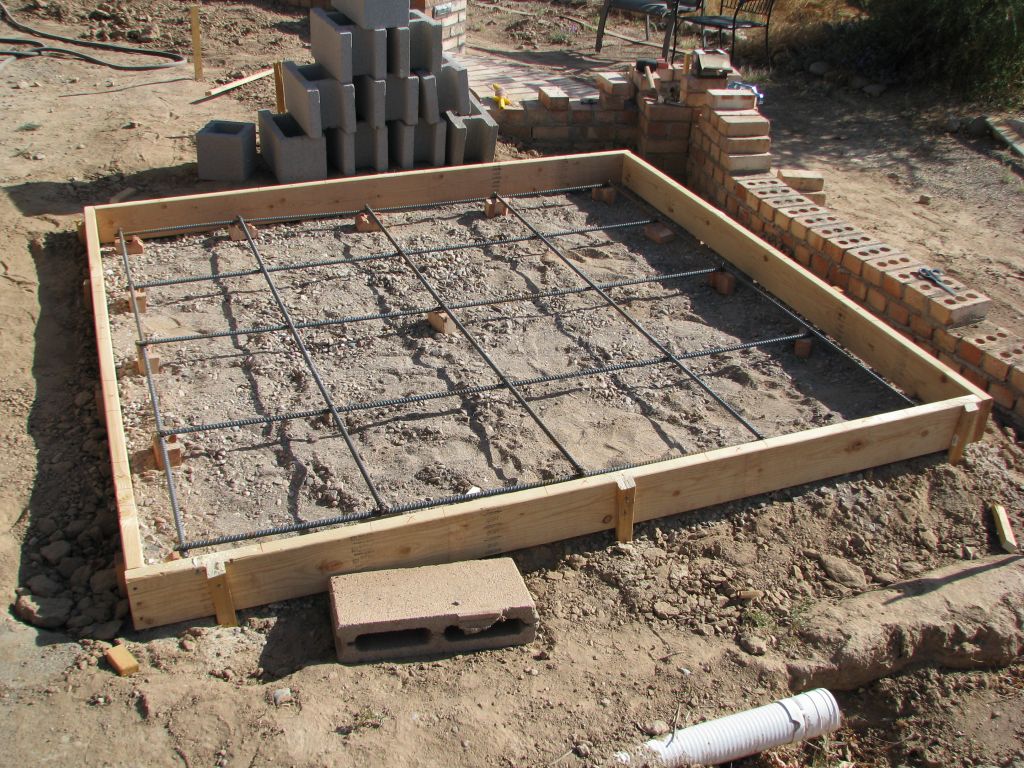
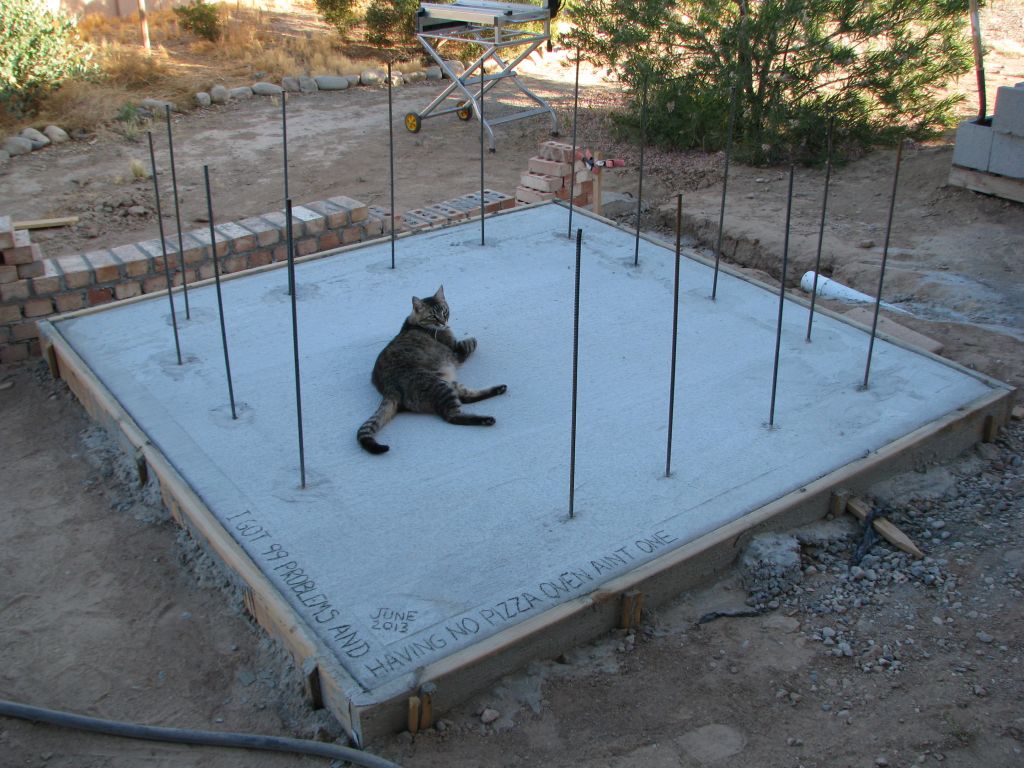
With the aid of a portable concrete mixer, it took about four hours and about 20 batches to pour the pad. Pour, screed, tamp, trowl, repeat. Before pouring, I laid out the concrete block to mark on the forms where the voids in the block are. In some videos, I've seen folks wait until the pad concrete is cured and then drill holes for vertical rebar. I would rather take advantage of the pliability of the wet concrete and hammer the vertical rebar into the pad. Zephyr approves the work.
After a week of letting the concrete cure, I begin building the block walls. In Arizona, June is the hottest month of the year and this day was no exception with a high of 110F. I borrowed a shade canopy and will probably outfit it with a mist system as the temperature rises. The only thing that I did in this part of the project was lay out a dry run of the block, measure for square corners, and snap all of the block edges with a chalk line.
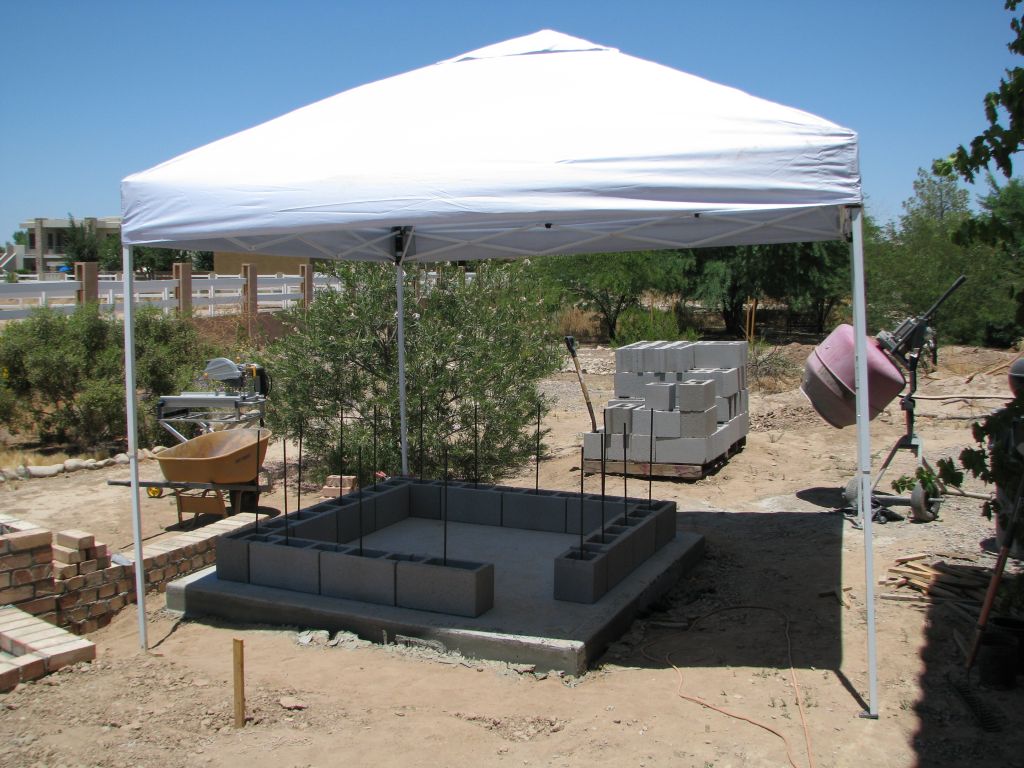
The first layer of block is completed. There are no temperature issues at this stage of construction so I can use standard mortar with 3/8 inch joints. As the wall goes up, I mix concrete to fill the block voids that have vertical rebar.
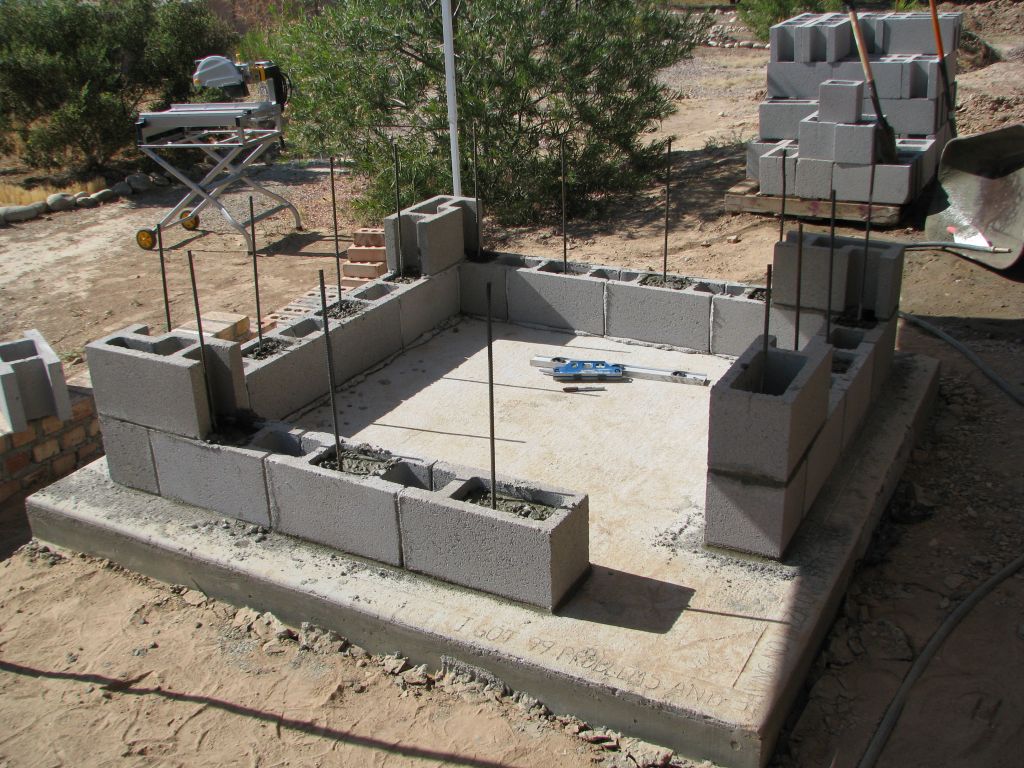
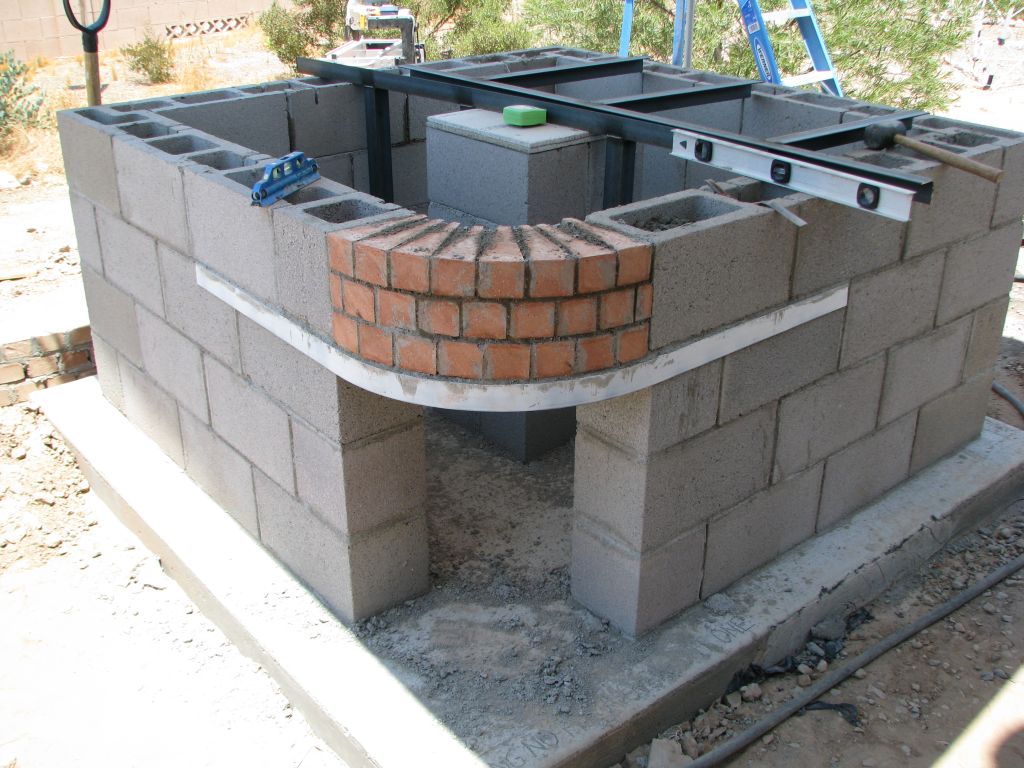
Once I got three rows up, I needed to figure out how to make the fourth row "bridge" above the cavity under the oven. I've seen some ovens that use block but mine presented an interesting problem because of the angle.
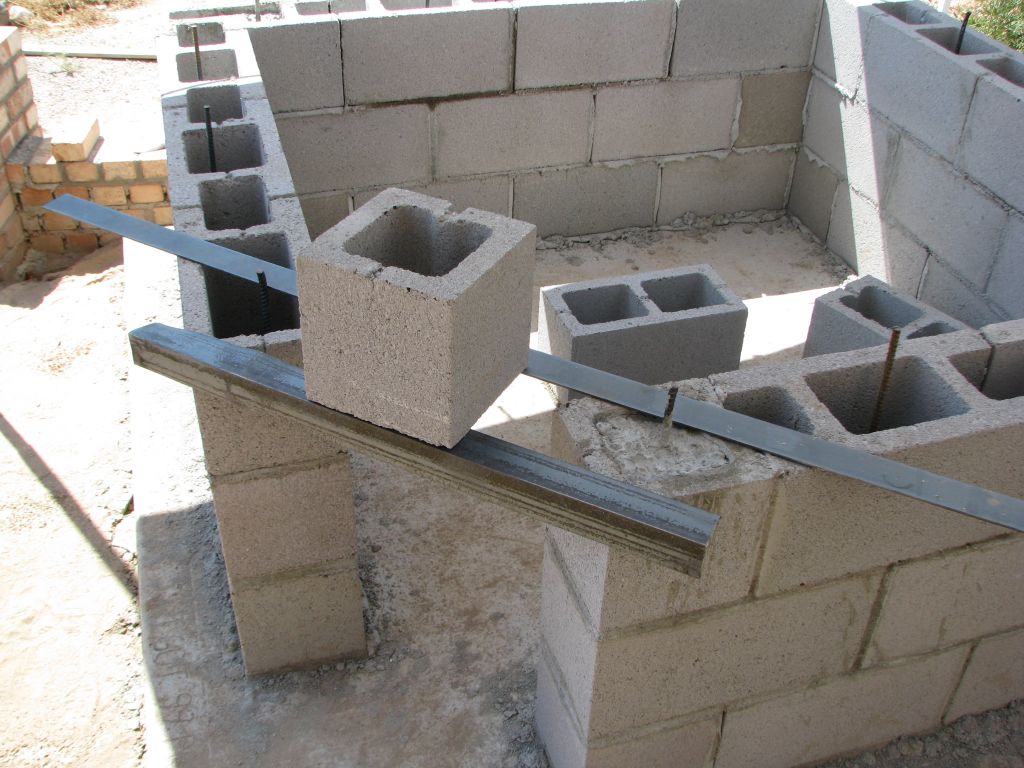
Rather than making an octagonal corner, I fabricated a round bridge that will be sandwiched between the third and forth layers. I attached a rounded piece of Durock to the underside of the bridge and welded it in place.
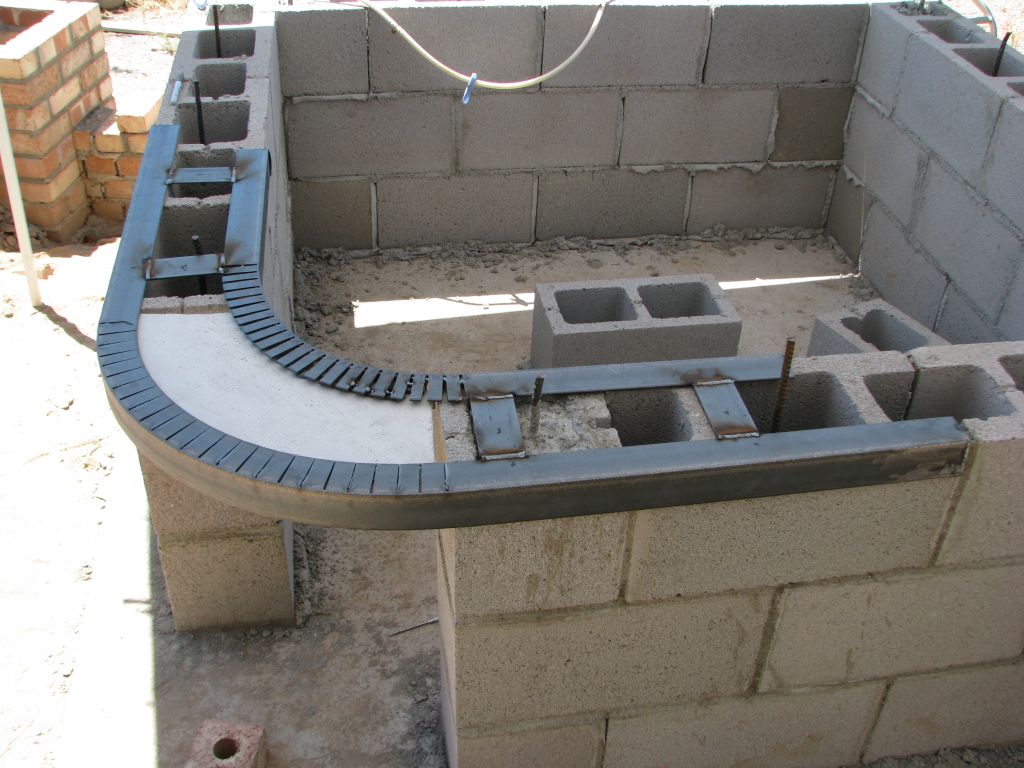
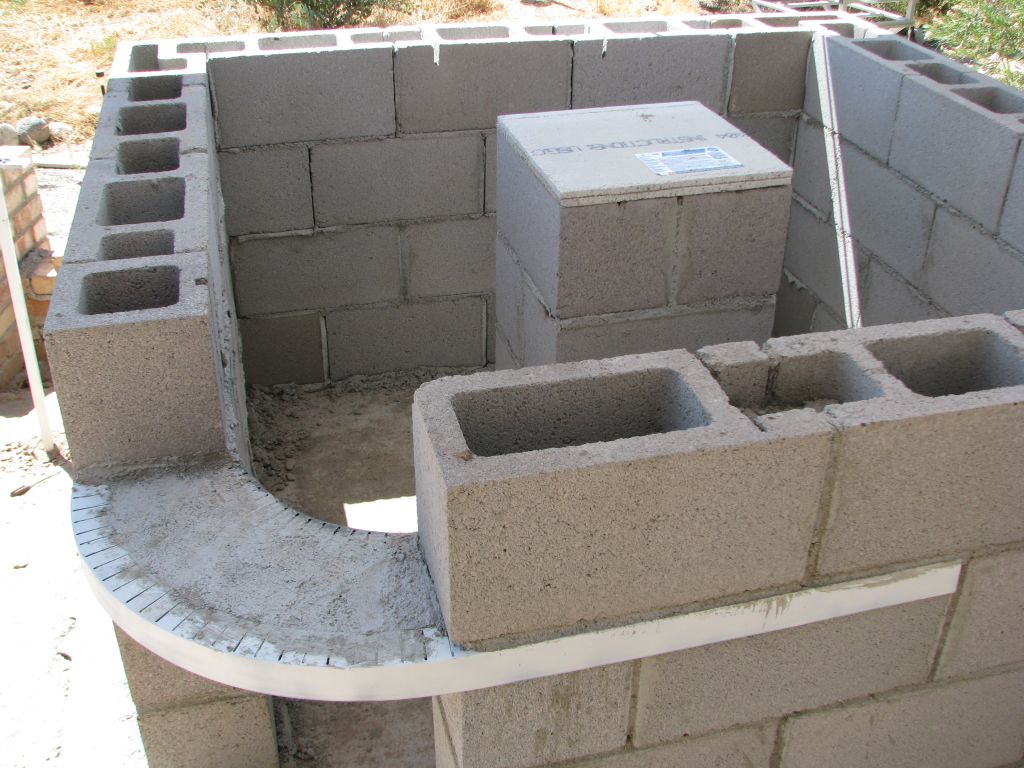
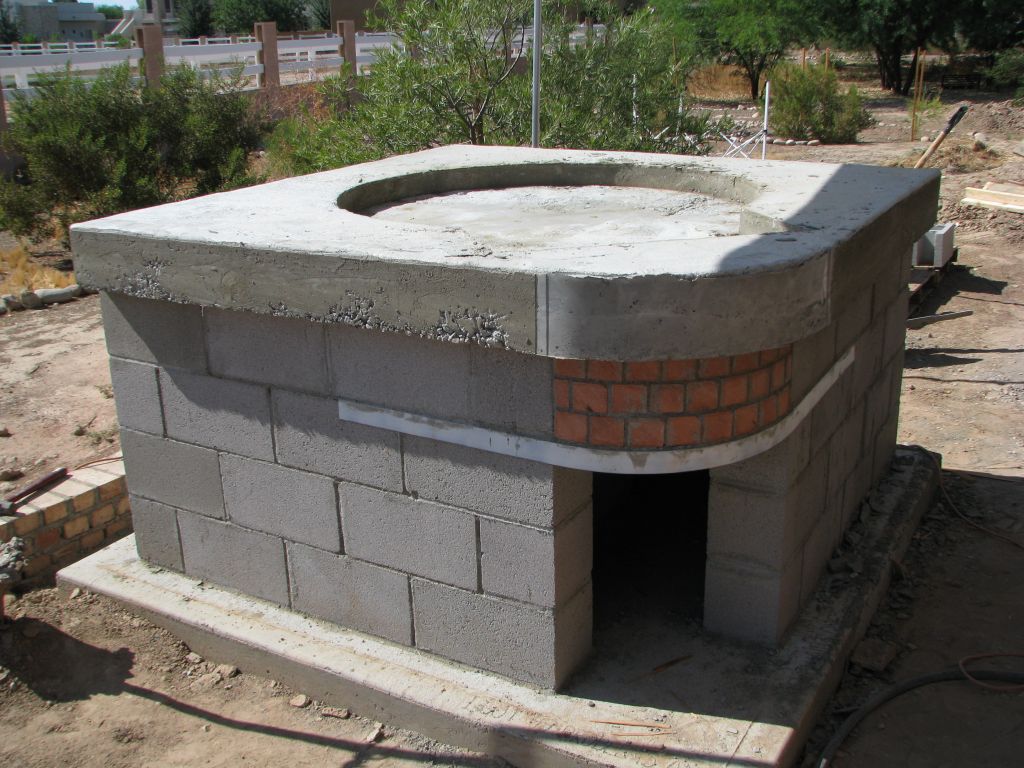
After the final rows of blocks are in place, I slathered on a coat of mortar to prepare for the bricks that will follow. At this point, I also built a central column in the center of the oven cavity to serve as support for the hearth.
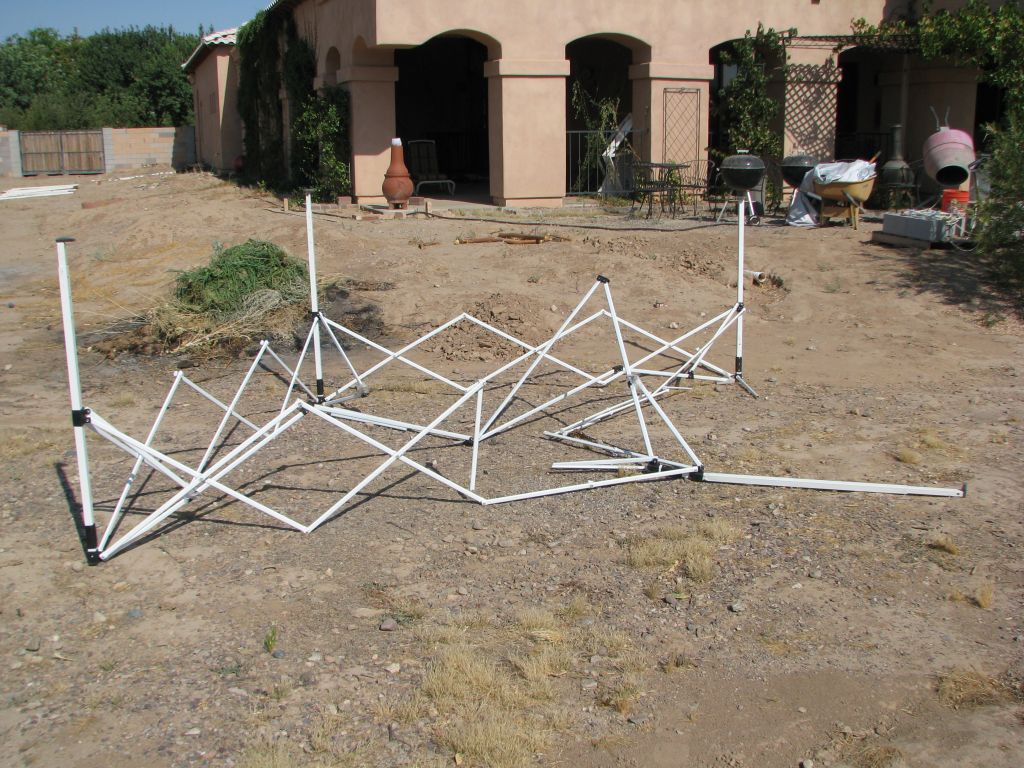
Minor disaster as the beginning of the monsoon season: A dust storm tore through before I got a chance to rescue my shade canopy and carried it across the yard, destroying it. I was able to salvage the fabric canopy part but the aluminum frame was not repairable.
After improvising a new support for the canopy, the "bridge" is completed and I am ready to start building the hearth forms.
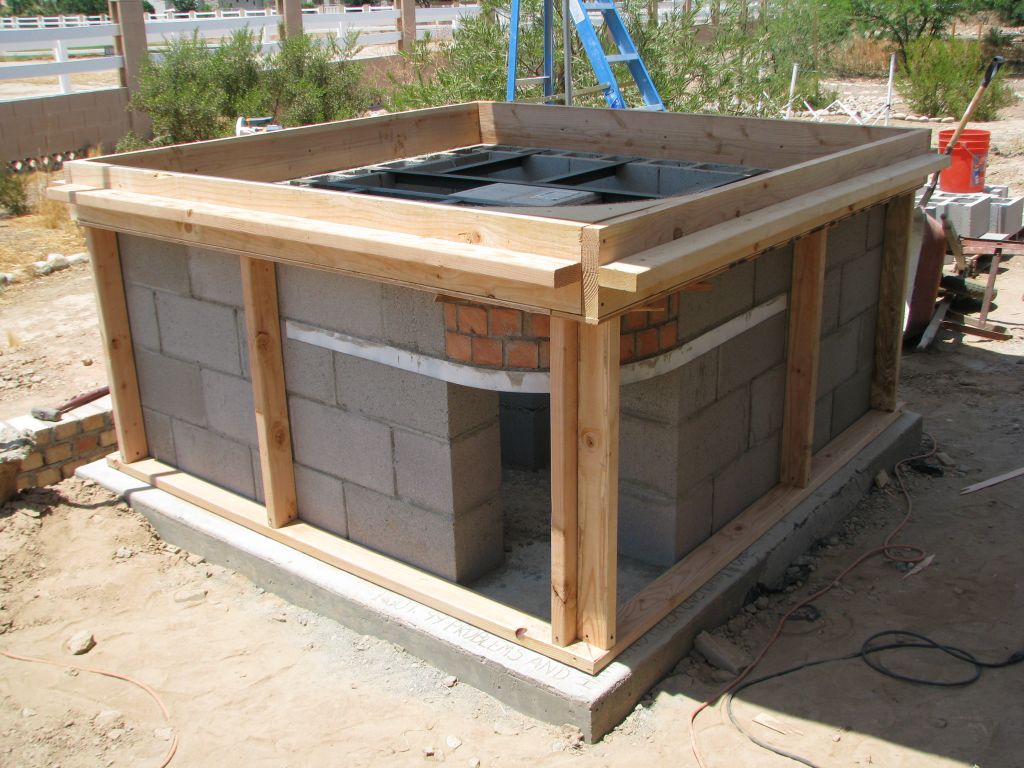
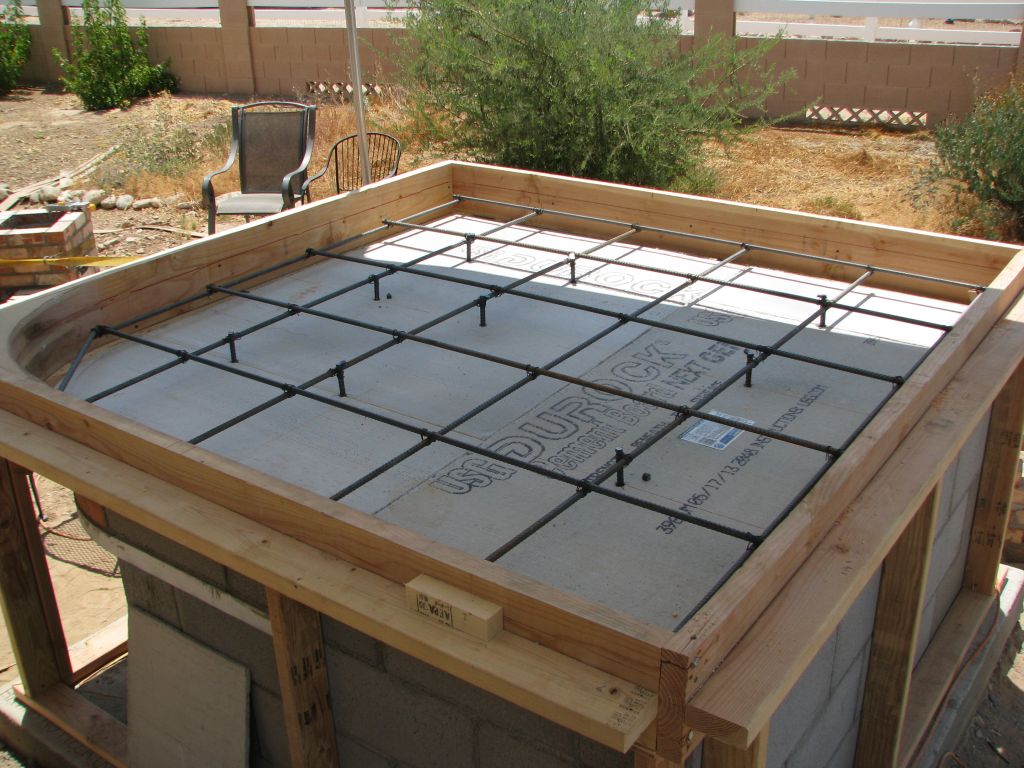
The hearth is to be a total of 7 inches thick with half-inch rebar reinforcement at approximately 14-inch intervals. The forms will extend out three inches on the south and east-facing sides but flush with the walls on the back north and west-facing sides. I also attached 2x4s perpendicular to the 4x8s to prevent outward flexing when I pour the concrete.
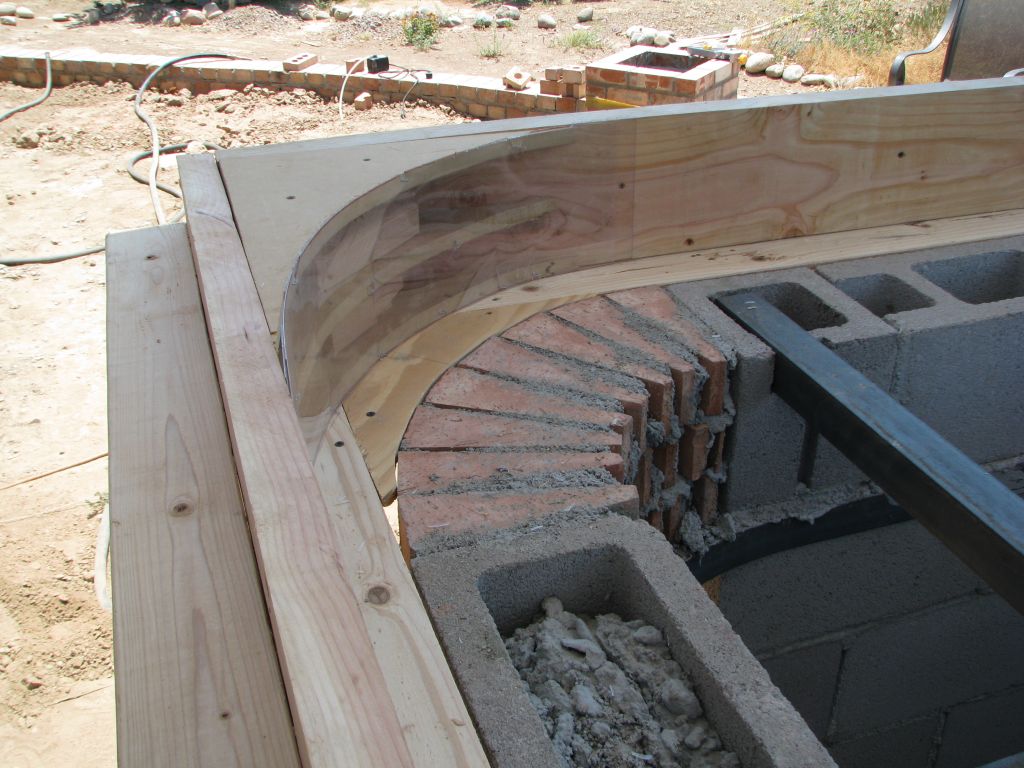
To create the front curve, I found some thin lexan plastic and built it into the corner.
To prepare for the Durock underlayment, I fabricated support beams made with angle iron. Part of the supports rest on the central column and the arms extend out to rest on grooves cut into the block walls. I then welded 4-inch pieces of rebar to the beams in places where the reinforcement grid of rebar will be anchored.
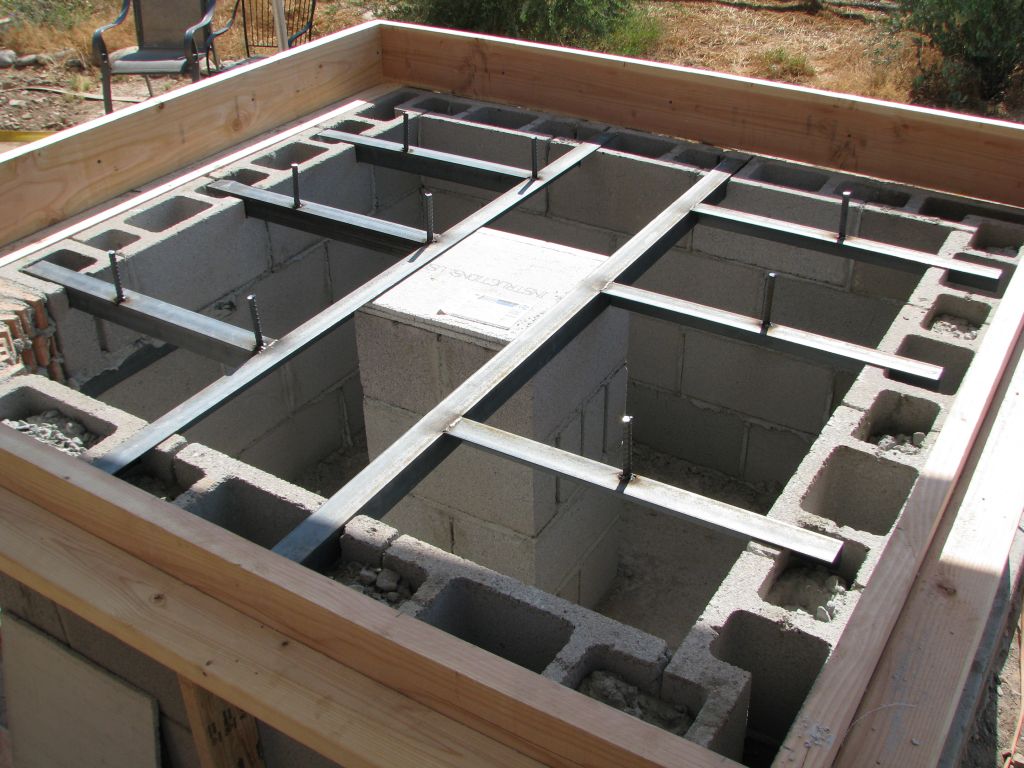
The underlayment required about 3 sheets of 3x5 Durock, after which the rebar reinforcement was installed.
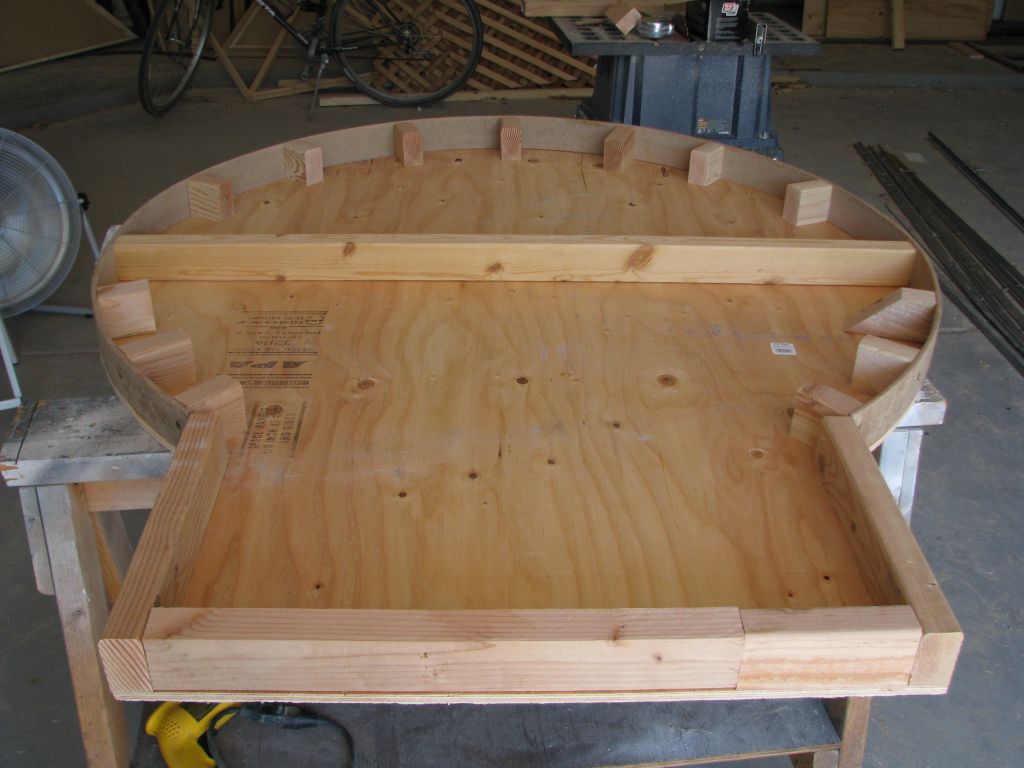
Before pouring, I built a special form to allow a three-inch cavity on top for the insulated concrete. I built it so that it can be easily disassembled and extracted from the hearth slab once the concrete is solid enough to remove it. I designed this form for a 39 inch inside diameter dome.
After pouring the first four inches of concrete, the form for the insulated concrete is fitted into place.
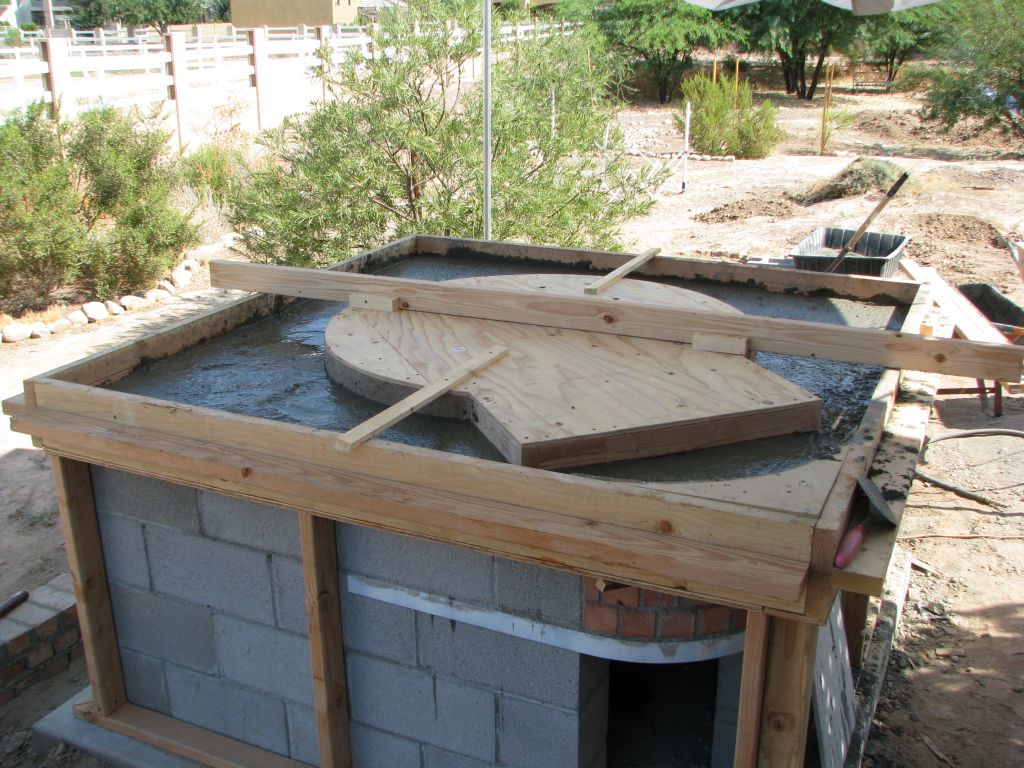
The edges around the center form are filled and supports are removed once it is stable enough not to move around.
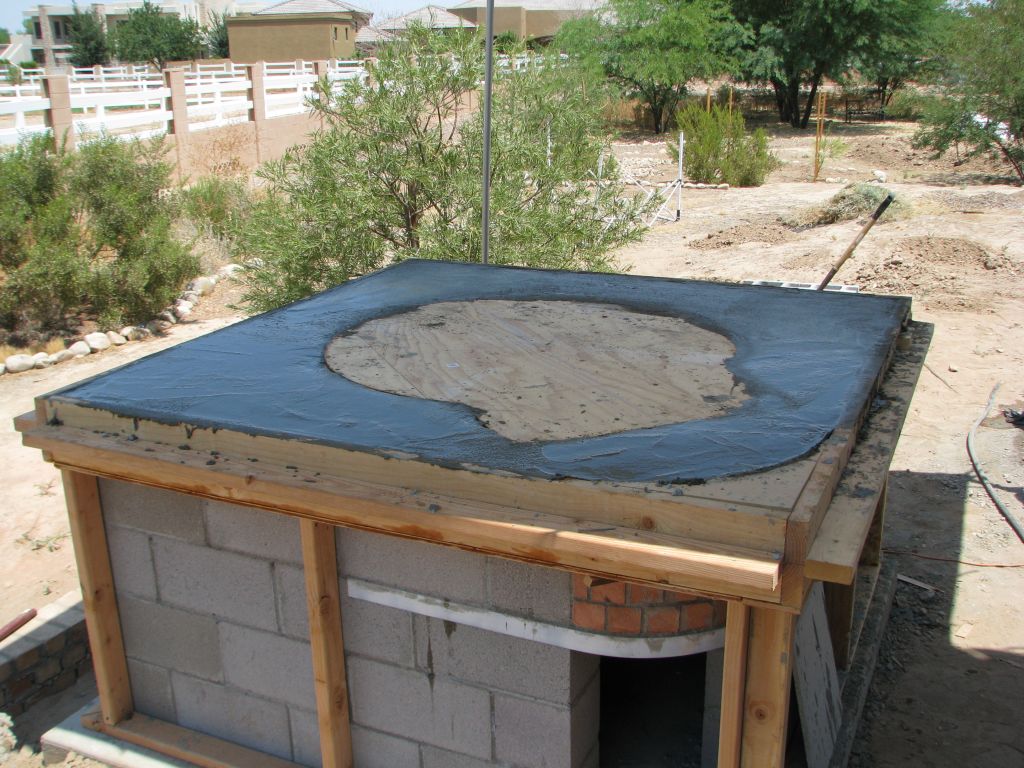
After about 4 days of slow curing by keeping the concrete wet, the forms are ready to remove. I'm not happy about the voids around the edges but there isn't much I can do about that at this point.
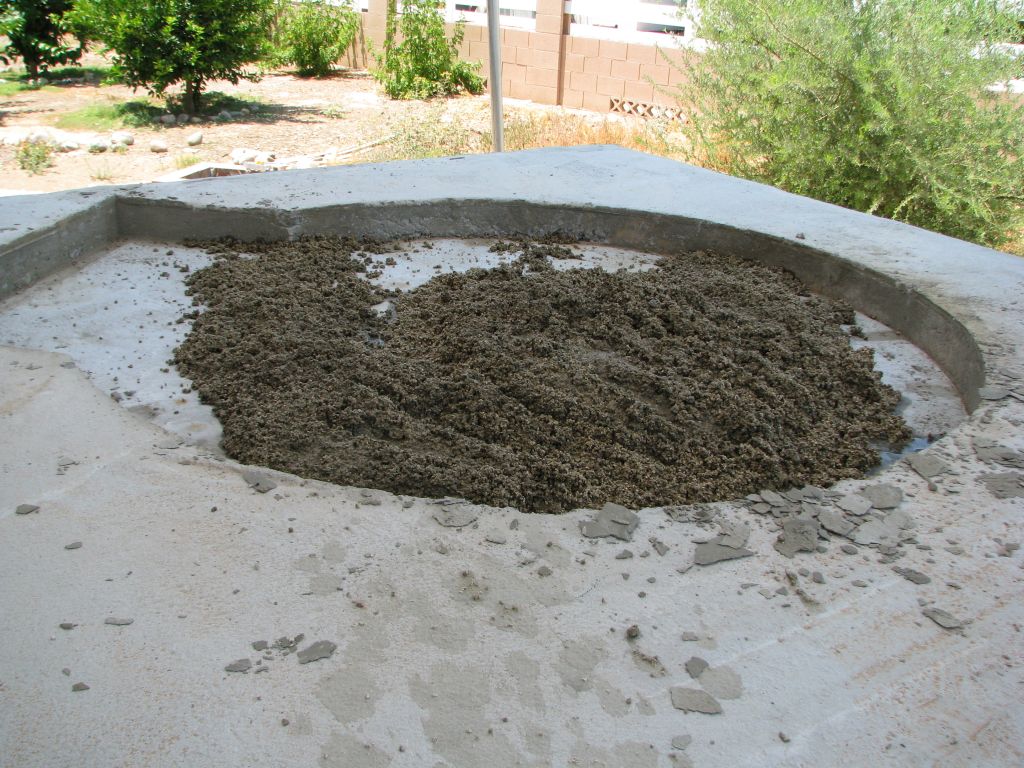
The hearth insulation is a mixture of concrete and vermiculite. The most surprising thing that I found during pouring of the insulated concrete phase was that the calculated volume of the void was about 3 cubic feet but it ended up requiring 6 cubic feet of vermiculite to complete the job. I could only conclude that if vermiculite is used for making insulated concrete, it compresses so you have to double the amount of vermiculite per calculated volume.
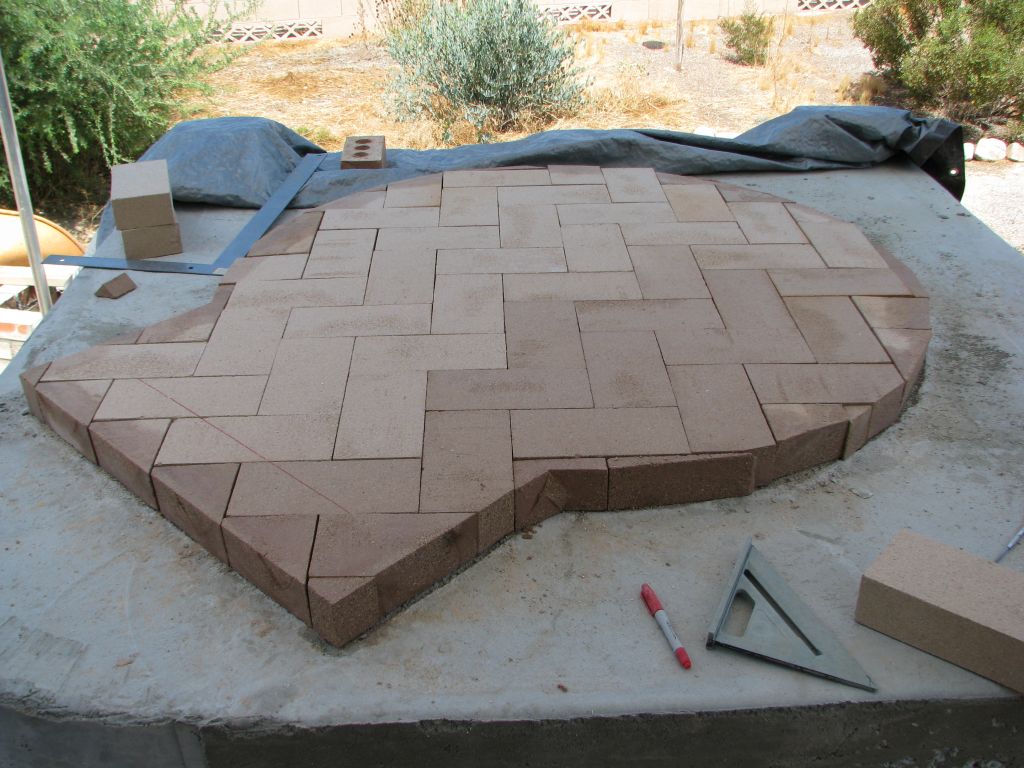
After a little over a week, the insulated concrete is firm enough to build on so hearth construction begins. The firebricks are laid out in a herringbone pattern over a very thin layer of fireclay and water mixture.
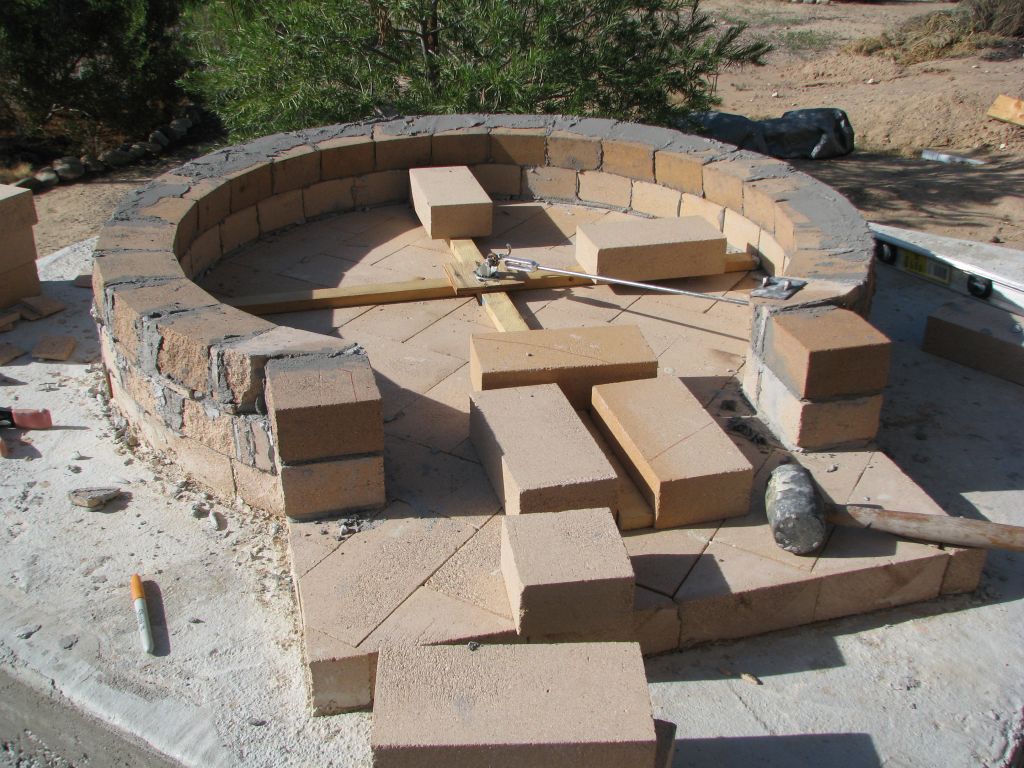
Getting the dome to be perfectly round required the use of a radius tool. It works by securing the tool to the center of the dome floor, allowing for a consistent distance to where I place the dome bricks. Although there were some available online, I built one myself.

Thus begins cutting and installing the bricks for the dome layers. I cut up lots of wedges to slide in the gaps to minimize the amount of mortar needed.
I had to build an arch frame in order to support the bricks in the dome arch. I inserted a few shivs underneath the arch so that when the mortar set, the arch could be easily removed after pulling the shivs out from underneath.
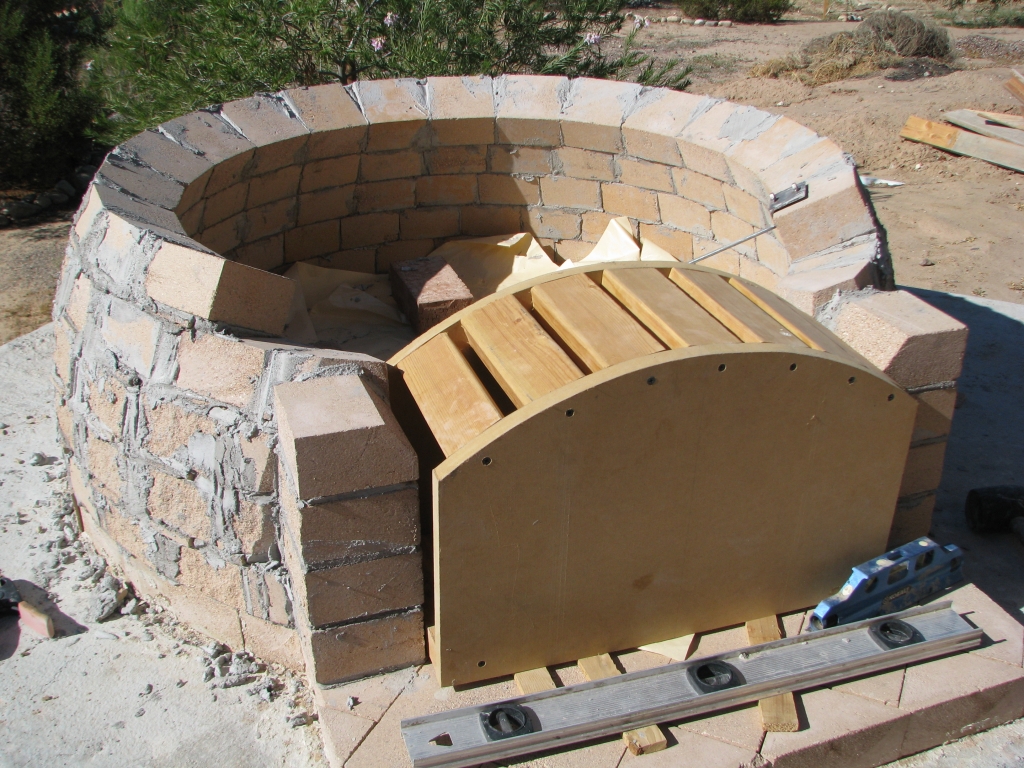
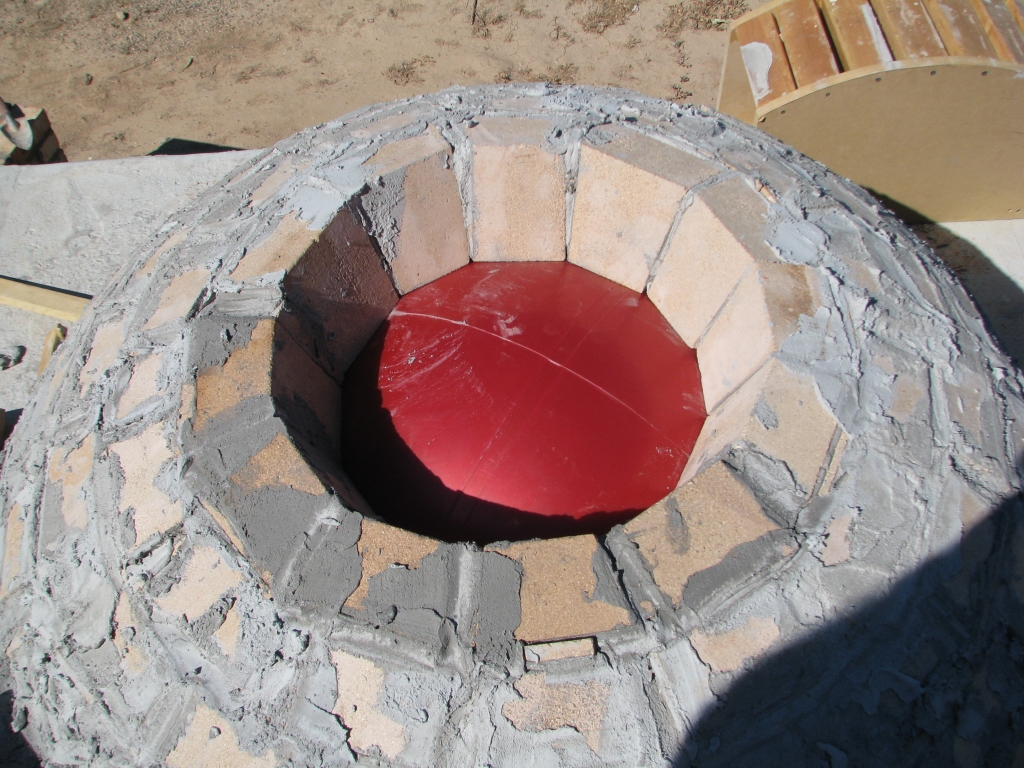
As I reached the top of the dome, almost vertical placement of the bricks became problematic because they would want to fall in to the oven as soon as I removed the spacing tool. At this point, I removed the spacing tool completely and inflated an exercise ball inside the dome to support the roof bricks.
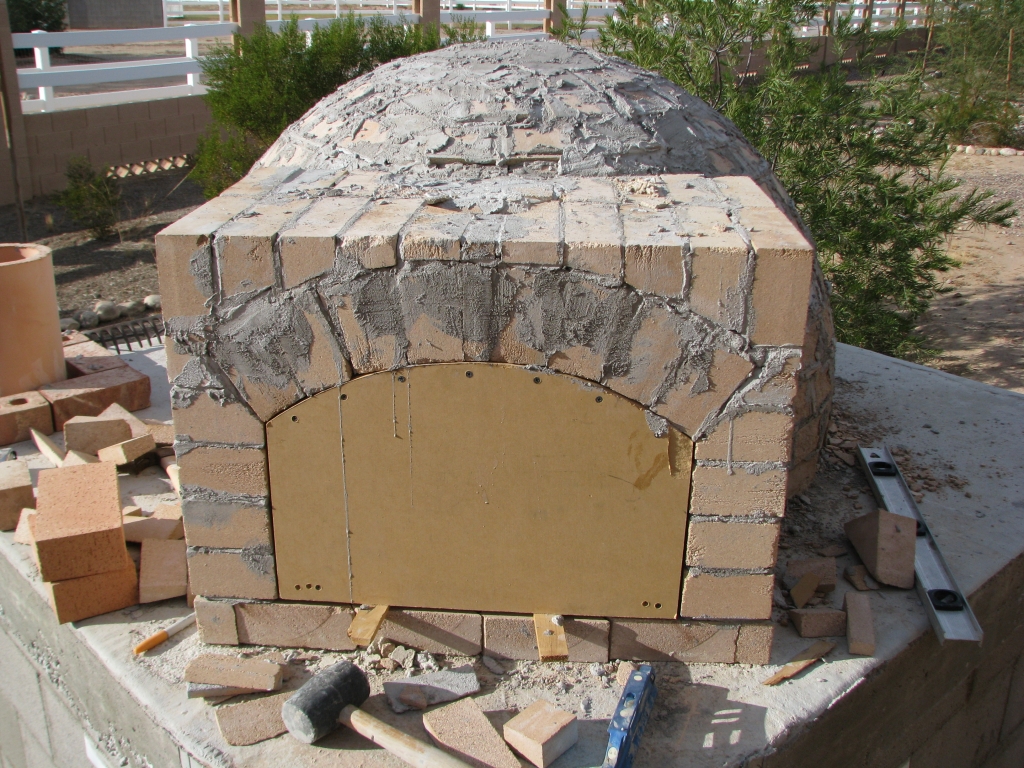
After completing the dome, I scooted the arch form up to complete the outer arch. I ended up squaring the top of the arch to prepare for the chimney.
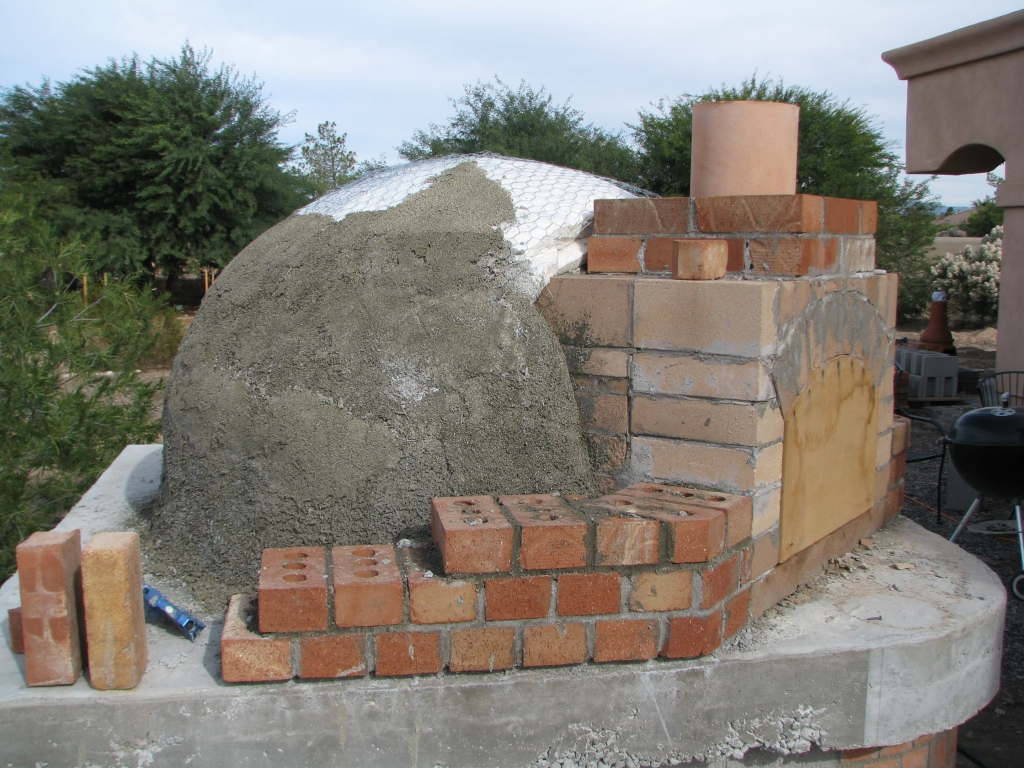
To complete insulation of the completed dome, I attached several layers of ceramic blanket over the dome with chicken wire to secure it.
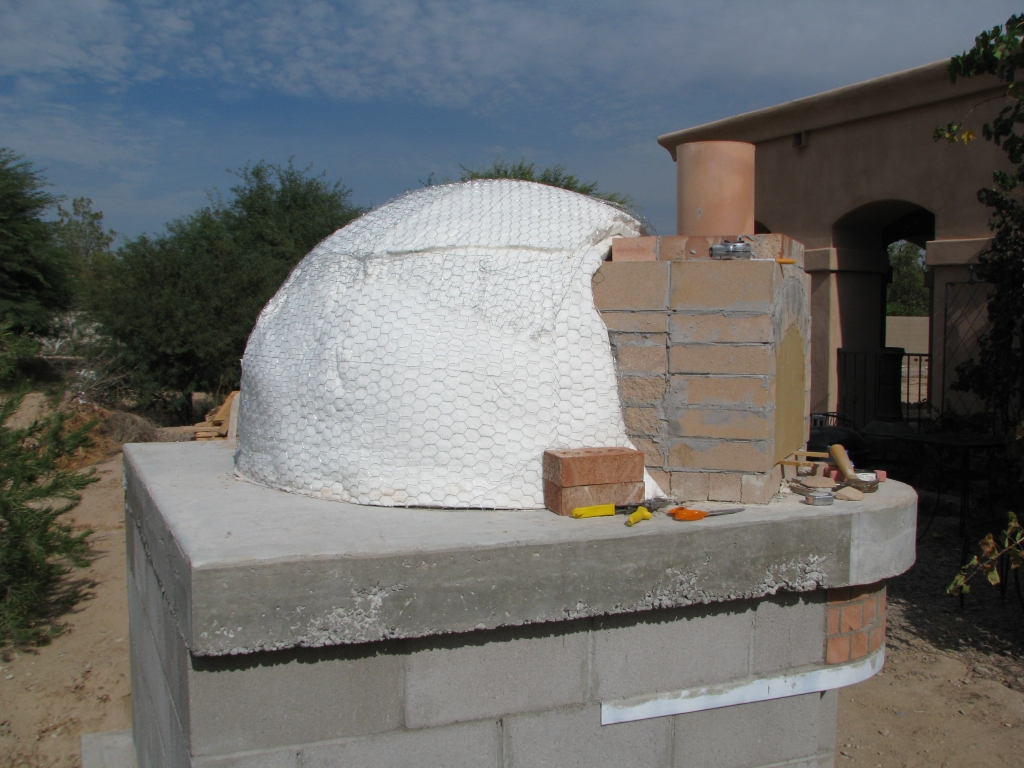
After installing the insulation blanket, I applied several layers of my vermiculite/concrete mixture.
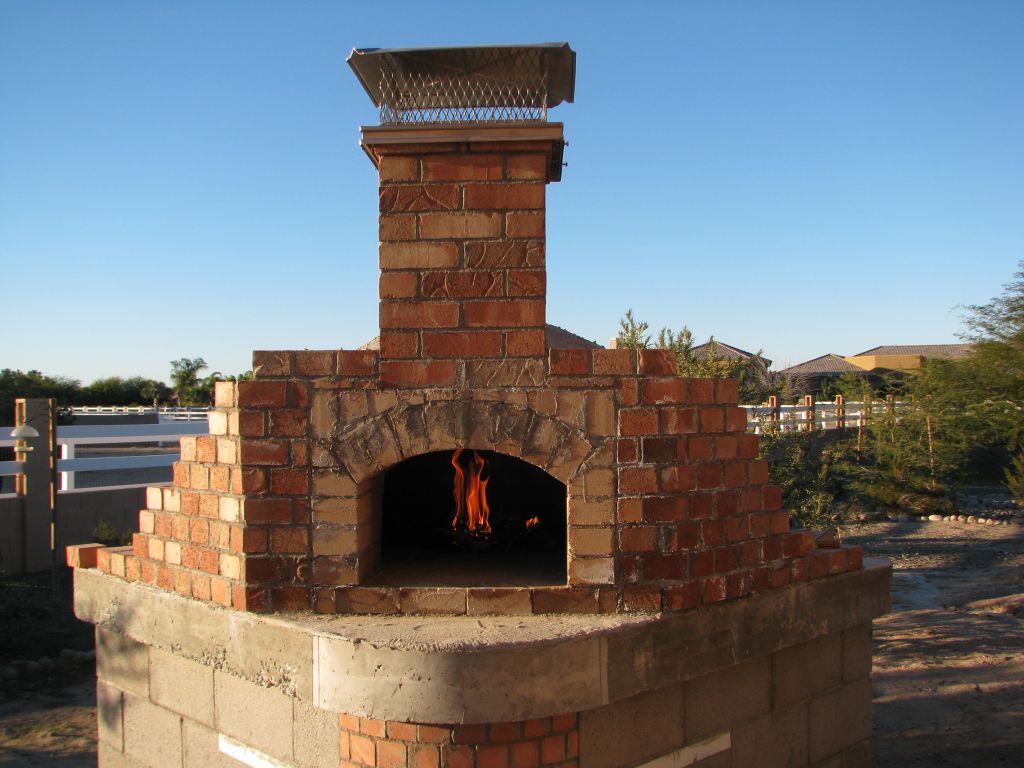
The final touch to make the oven functional is completion of the chimney. I let the mortar cure about 6 weeks before starting the first fire. Tempering the oven involved starting fires of increasing temperatures, (200F, 300F, 400F, eventually to 1000F+) letting the oven cool completely between firings.
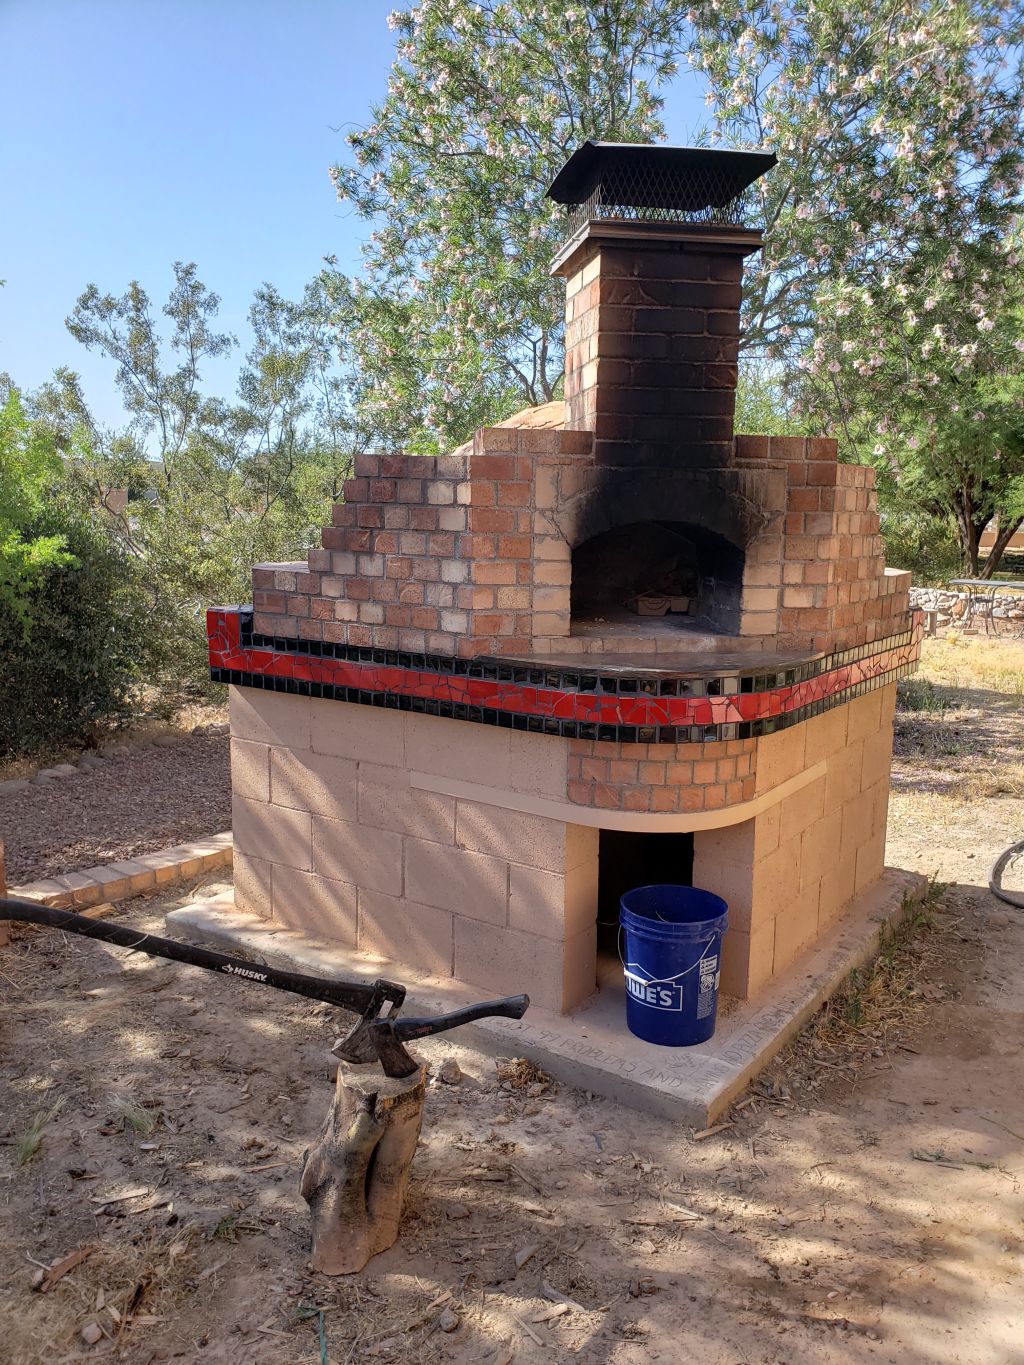
We have been using the oven regularly with no cosmetic progress until Winter 2019. Finishing touches included a custom-made stone hearth.

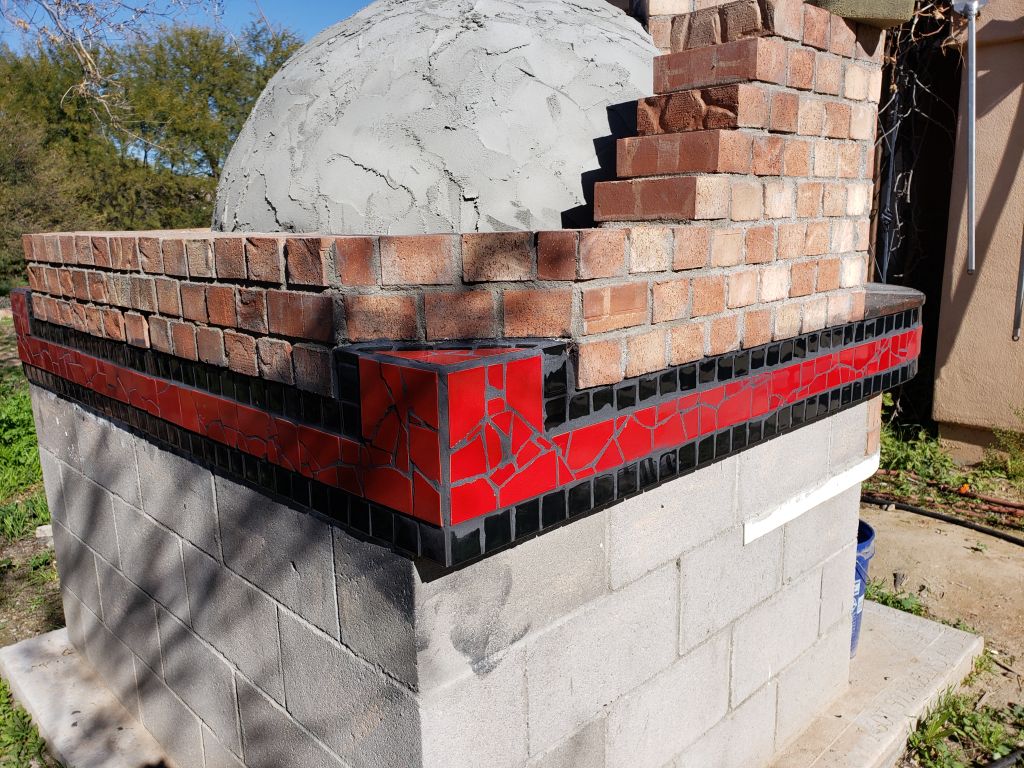
Completed the perimeter masonry, stuccoed the dome, and installed mosaic tile around the perimeter.
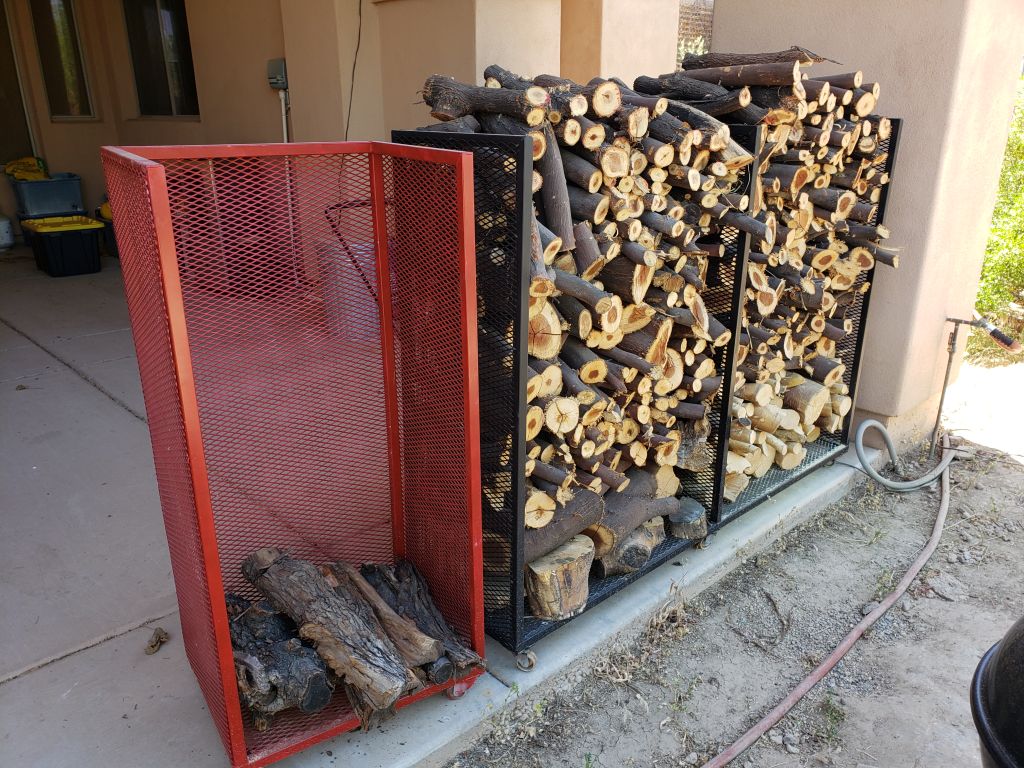
I used to buy pecan hardwood from a local guy but it got too expensive and difficult to transport. Fortunately, I have a yard full of mesquite trees that I harvest wood from each Spring. The wood takes 6-12 months to cure before it will burn right so I fabbed four curing racks. They have wheels so they can be moved around.
Completed May 2020
Finally, the last cosmetic work is completed with painting of the dome and walls