
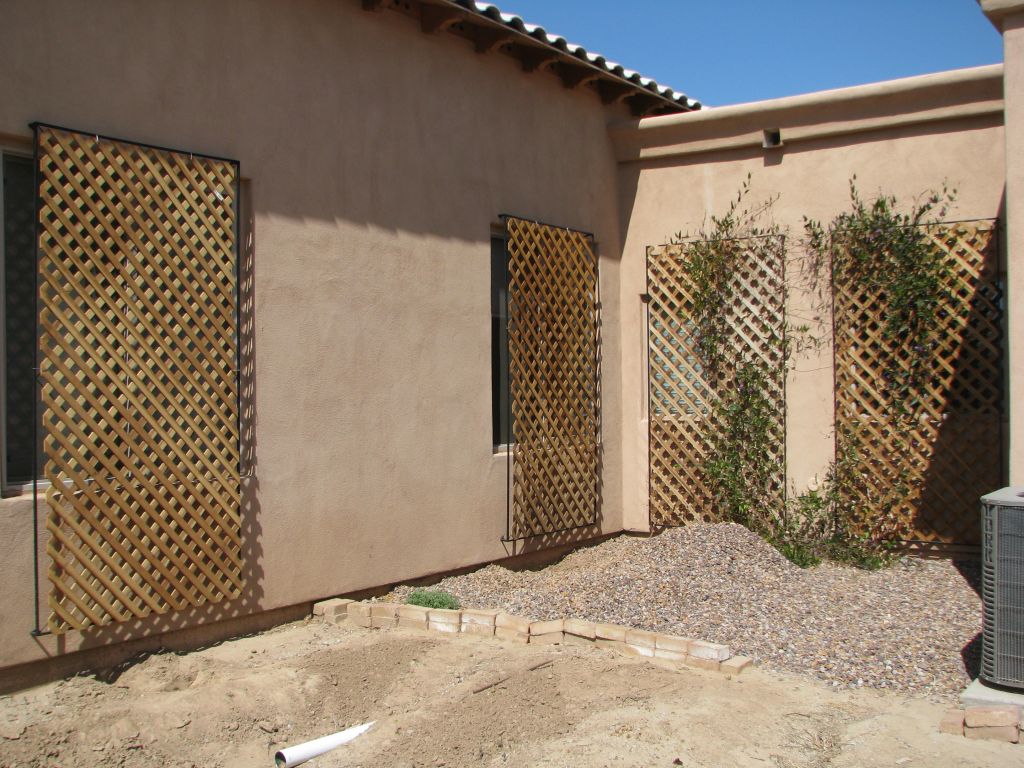
In about 2009, I
built a couple of 4x8 rectangular trellises and mounted
them to one of the south walls for my hardenbergia vines
to climb on. I didn't expect to expand on the project any
further at the time but the shade on that wall provided by
the trellises and vines was worth the trouble so in 2012 I
decided to build more. At first, I just built another
couple of 4x8 rectangular trellises but decided that
although they were functional, they looked really sloppy.
I planted some type of jasmine vine beneath them but it
will take a year or so before they become one with their
respective trellises.
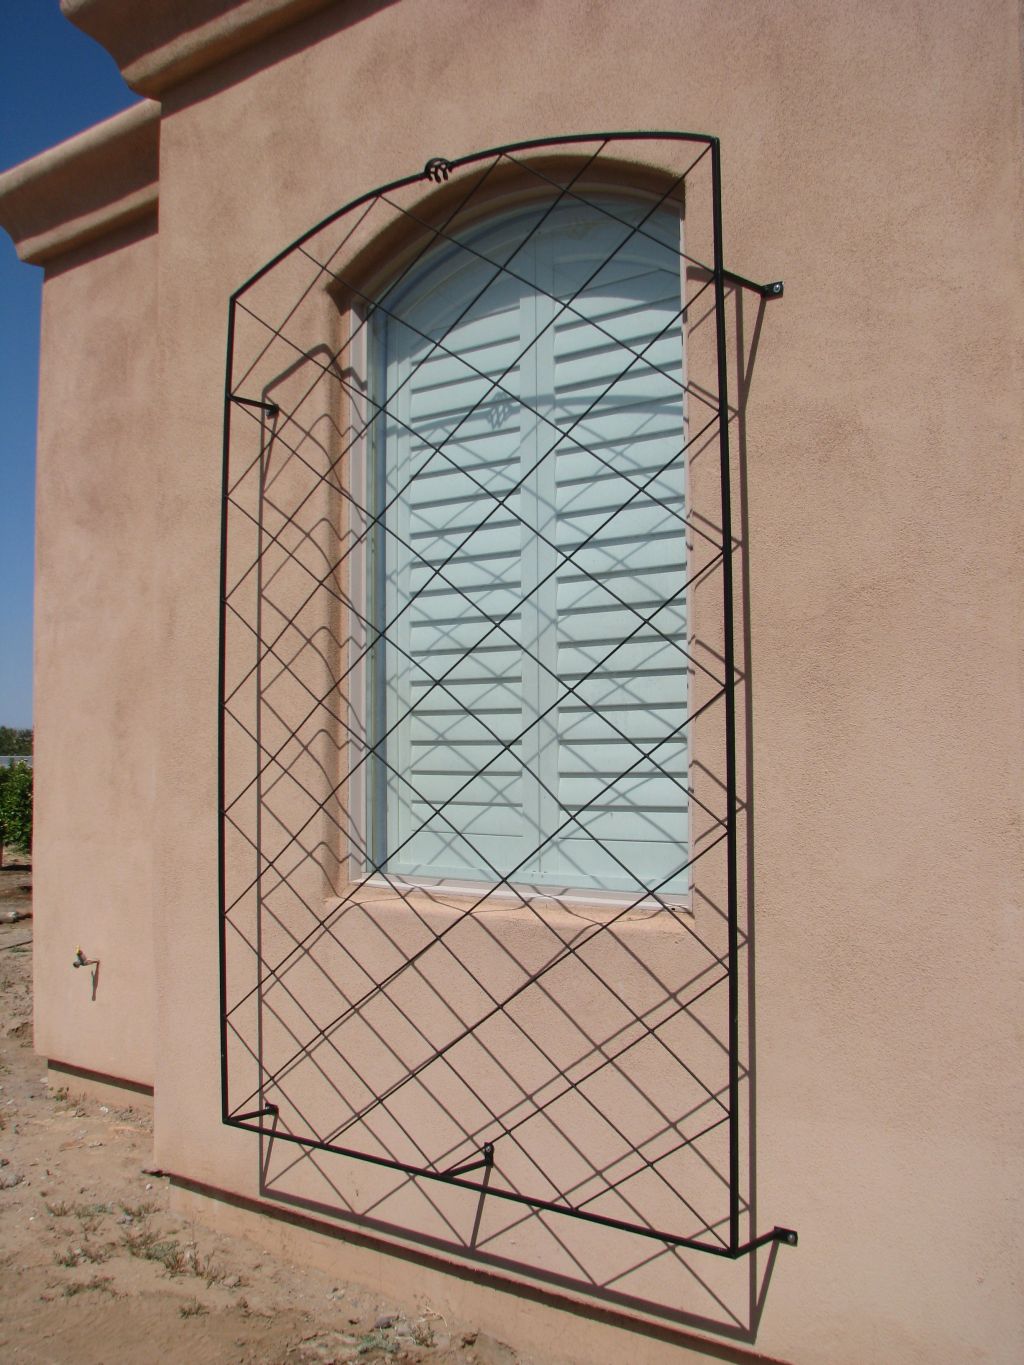
After those, I fabricated a larger 5x9 trellis with a rounded top to cover the bathroom window. I planted a white lady banksia rose in front of it, which should grow to about 15-20 feet in all directions. The trellis will anchor most of it to the wall to provide some relieve from the scorching Summer heat.
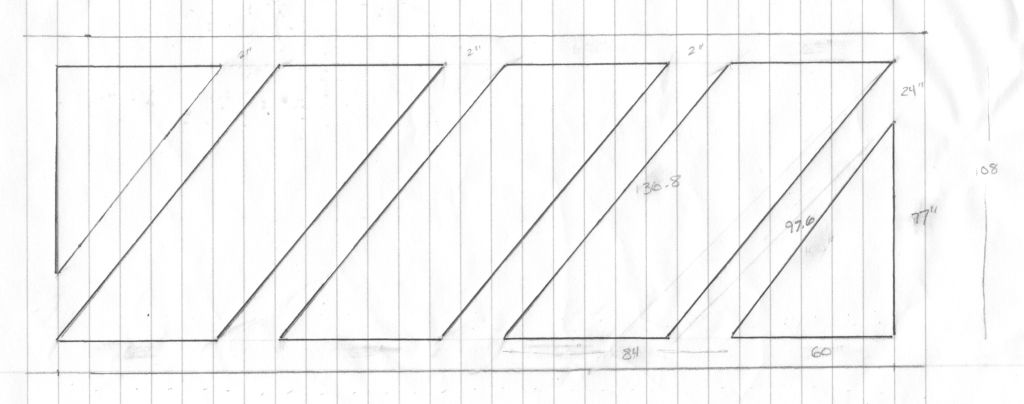
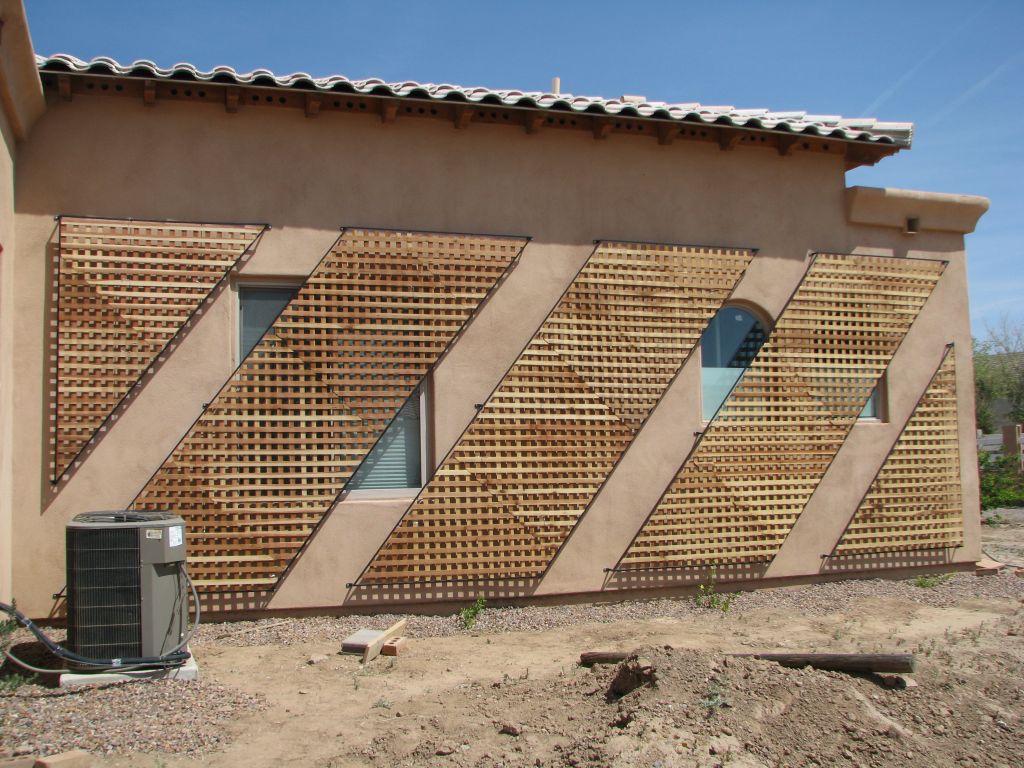
The final phase was a bit more ambitious. Not wanting to repeat the same, boring, rectangular design that I had built before, I designed a pattern that would cover most of the wall and look unlike anything else that I had built. The idea was to build three trapezoidal trellises, flanked on each end by triangular trellises.
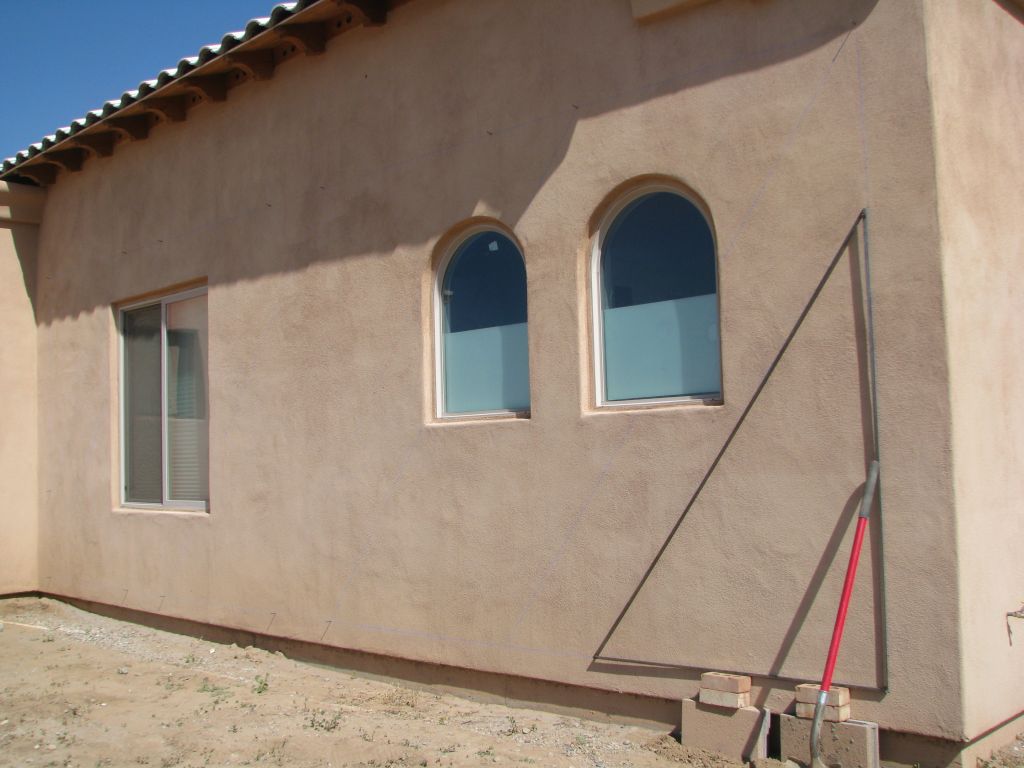
From this design, I started out by marking with a chalk line where each panel would be installed. In the next picture, I propped up the first welded frame to see how it fit the chalk line.
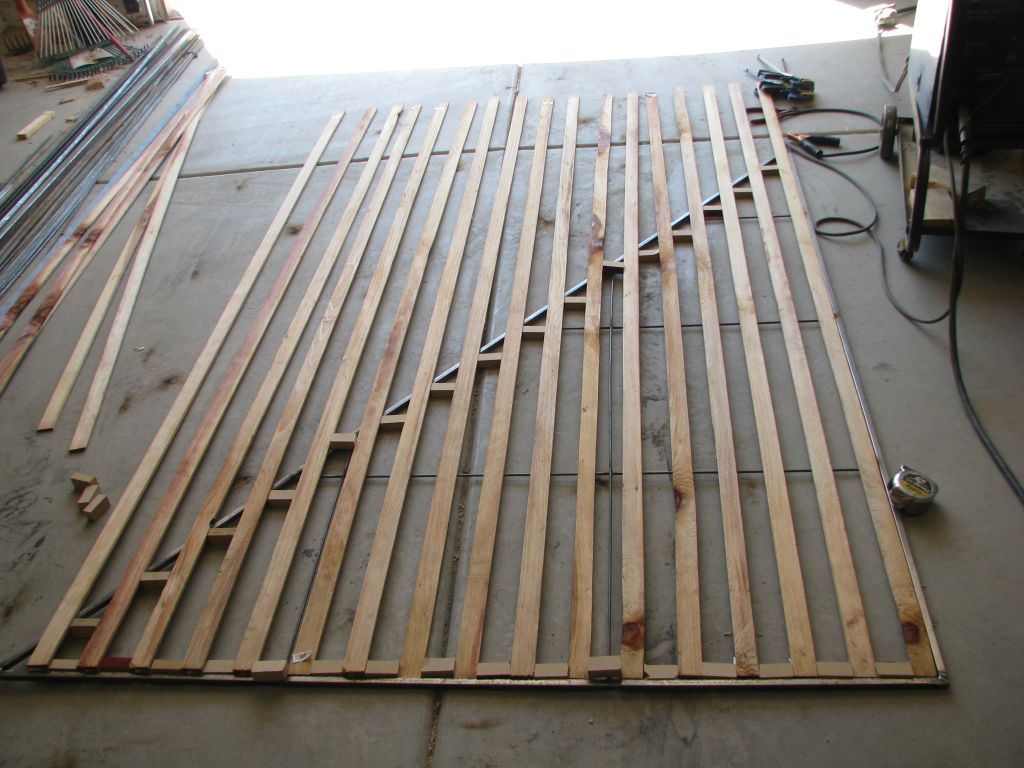
I got the bright idea of building my own trellis from individual strips, which I did with the first trellis panel. However, this turned out to be horribly time-consuming and murder on my back from crouching over. I also discovered that a standard staple gun is the WRONG tool for this job because the staples barely penetrate the wood. I ended up buying a 3-gallon air compressor and a pneumatic stapler, which worked out MUCH better than the staple gun.
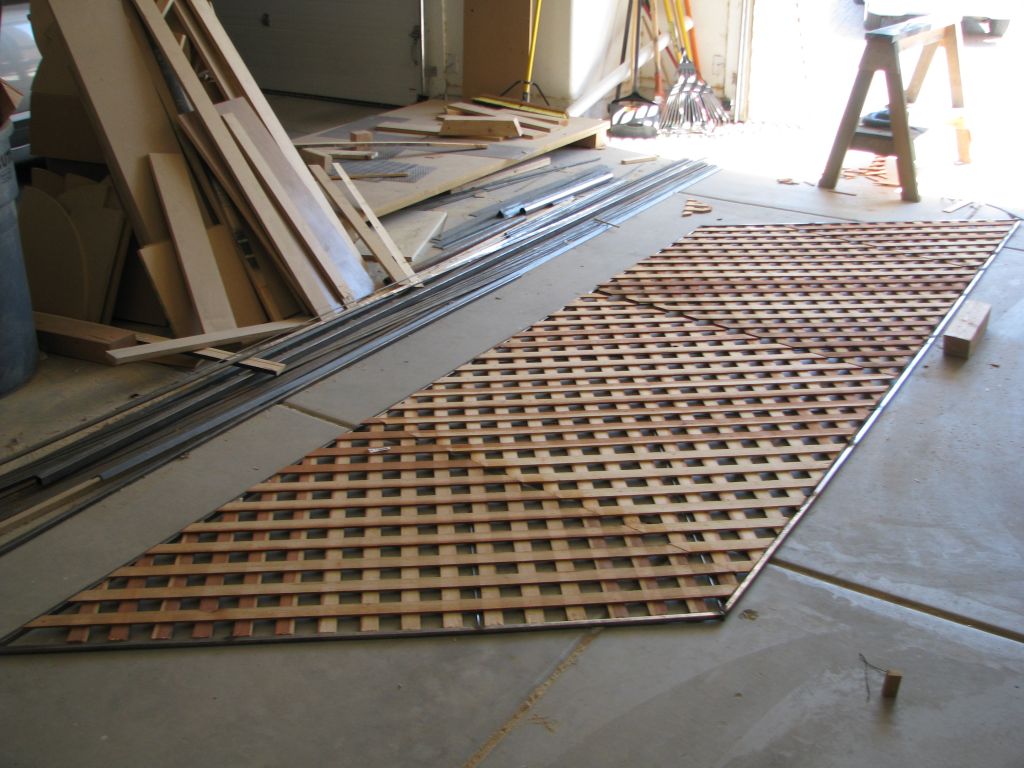
The next three panels were the trickiest. They are trapezoidal and about 12 feet long on the long edges, which made them very difficult to build, move, and install. I did figure out a much simpler method for installing the trellis material to the steel frame. Rather than using individual redwood strips, I bought a bunch of 4x8 trellis panels and cut them in sections that fit the frame. I used to pneumatic stapler and scrap redwood to attach the pieces together so that they looked like a single, giant trellis panel. The edges of the pieces didn't match up perfectly evenly but the joints between them actually had a nice effect once the panels were installed.
The panels were much easier to install with help but on days that I felt like installing, I had no help so I had to prop them up with posts and bricks until they fit. The completed frames are attached to the masonry wall with anchored bolts so that they can't be pulled out. I attached the completed trellis panels to each frame with aluminum wire.

Finally, all the panels are installed. I planted Carolina Jasmine vines at the base of each one, which do just fine in the sun and will grow to over 20 feet
After those, I fabricated a larger 5x9 trellis with a rounded top to cover the bathroom window. I planted a white lady banksia rose in front of it, which should grow to about 15-20 feet in all directions. The trellis will anchor most of it to the wall to provide some relieve from the scorching Summer heat.
The final phase was a bit more ambitious. Not wanting to repeat the same, boring, rectangular design that I had built before, I designed a pattern that would cover most of the wall and look unlike anything else that I had built. The idea was to build three trapezoidal trellises, flanked on each end by triangular trellises.
From this design, I started out by marking with a chalk line where each panel would be installed. In the next picture, I propped up the first welded frame to see how it fit the chalk line.
I got the bright idea of building my own trellis from individual strips, which I did with the first trellis panel. However, this turned out to be horribly time-consuming and murder on my back from crouching over. I also discovered that a standard staple gun is the WRONG tool for this job because the staples barely penetrate the wood. I ended up buying a 3-gallon air compressor and a pneumatic stapler, which worked out MUCH better than the staple gun.
The next three panels were the trickiest. They are trapezoidal and about 12 feet long on the long edges, which made them very difficult to build, move, and install. I did figure out a much simpler method for installing the trellis material to the steel frame. Rather than using individual redwood strips, I bought a bunch of 4x8 trellis panels and cut them in sections that fit the frame. I used to pneumatic stapler and scrap redwood to attach the pieces together so that they looked like a single, giant trellis panel. The edges of the pieces didn't match up perfectly evenly but the joints between them actually had a nice effect once the panels were installed.
The panels were much easier to install with help but on days that I felt like installing, I had no help so I had to prop them up with posts and bricks until they fit. The completed frames are attached to the masonry wall with anchored bolts so that they can't be pulled out. I attached the completed trellis panels to each frame with aluminum wire.
Finally, all the panels are installed. I planted Carolina Jasmine vines at the base of each one, which do just fine in the sun and will grow to over 20 feet