We had this silly notion
of a secret room in which we store our wine. The problem is that we go
through wine so quickly that it seldom gets a chance to age. The
typical stuff that we find at the local BevMo isn't good enough that
time will improve its quality. This stuff we consume so quickly that we
don't bother bringing it down to the rathskeller, but rather line the
bottles up like shooting gallery targets so that we can empty them with
careless abandon. Well, I do but I'm a hopeless wino and I have
frequent guests who share my enthusiasm for wine in the
marginal-to-mediocre range.
We did acquire some "top shelf" wine in February 2009 during a trip to Napa. The reds (e.g., Cabernet, Pino Noir, Zinfindel, etc.) are still somewhat "young" and will improve with age. We bring them up for special occasions. No details on what is in the collection - you will see what is in the rathskeller when you visit.
After our return from Napa, the "top shelf" stuff sat in cases on the floor of the rathskeller for a year. Being the coolest room in the house (between 68-76 degrees), I wasn't too worried about premature aging from the temperature. However, the bottles were sitting in their cases upright, which can dry out the cork and ruin the wine that way. Therefore, I wanted a wine rack that would at least allow the bottles to be safely stored on their sides.
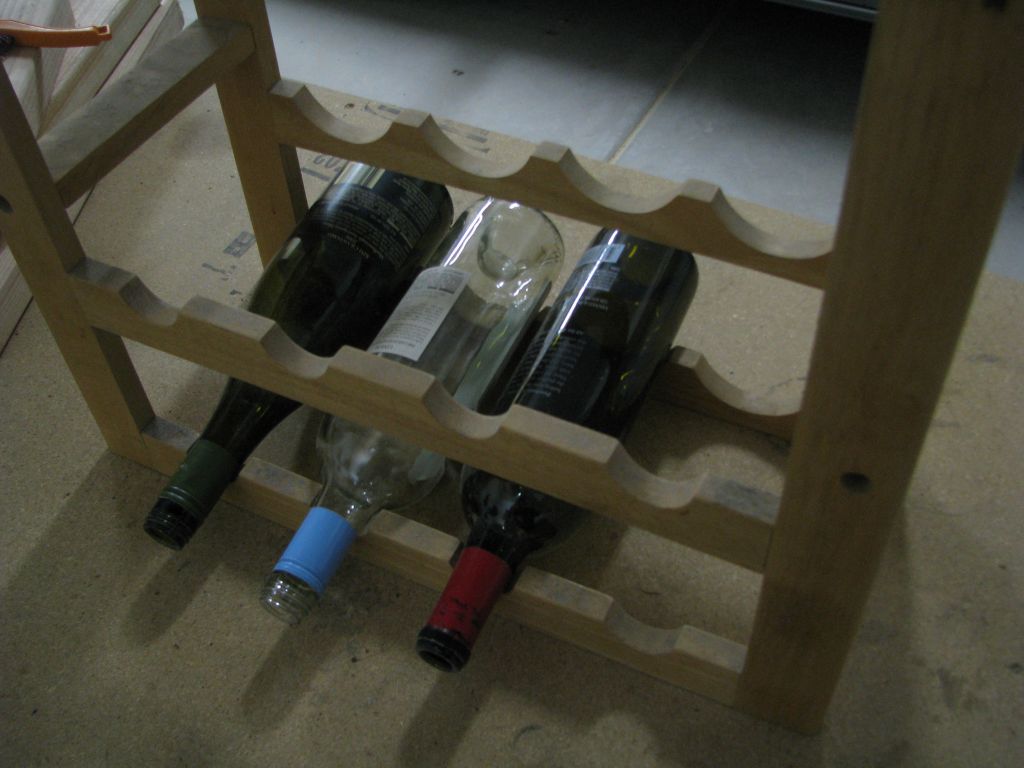
I looked at wine racks online but they were all flimsy, overpriced, and not particularly attractive. The really nice ones were prohibitively expensive. My alternative was to take from the designs that I liked the best and create something truly custom. The design I came up with was practical but had that "old world" French wine cellar look. My inspiration came from a simple combination bottle and wine glass rack that I acquired years ago. We have actually been using it for storing both wine and wine glasses, except for the past couple of months while I've been analyzing it for my new design.
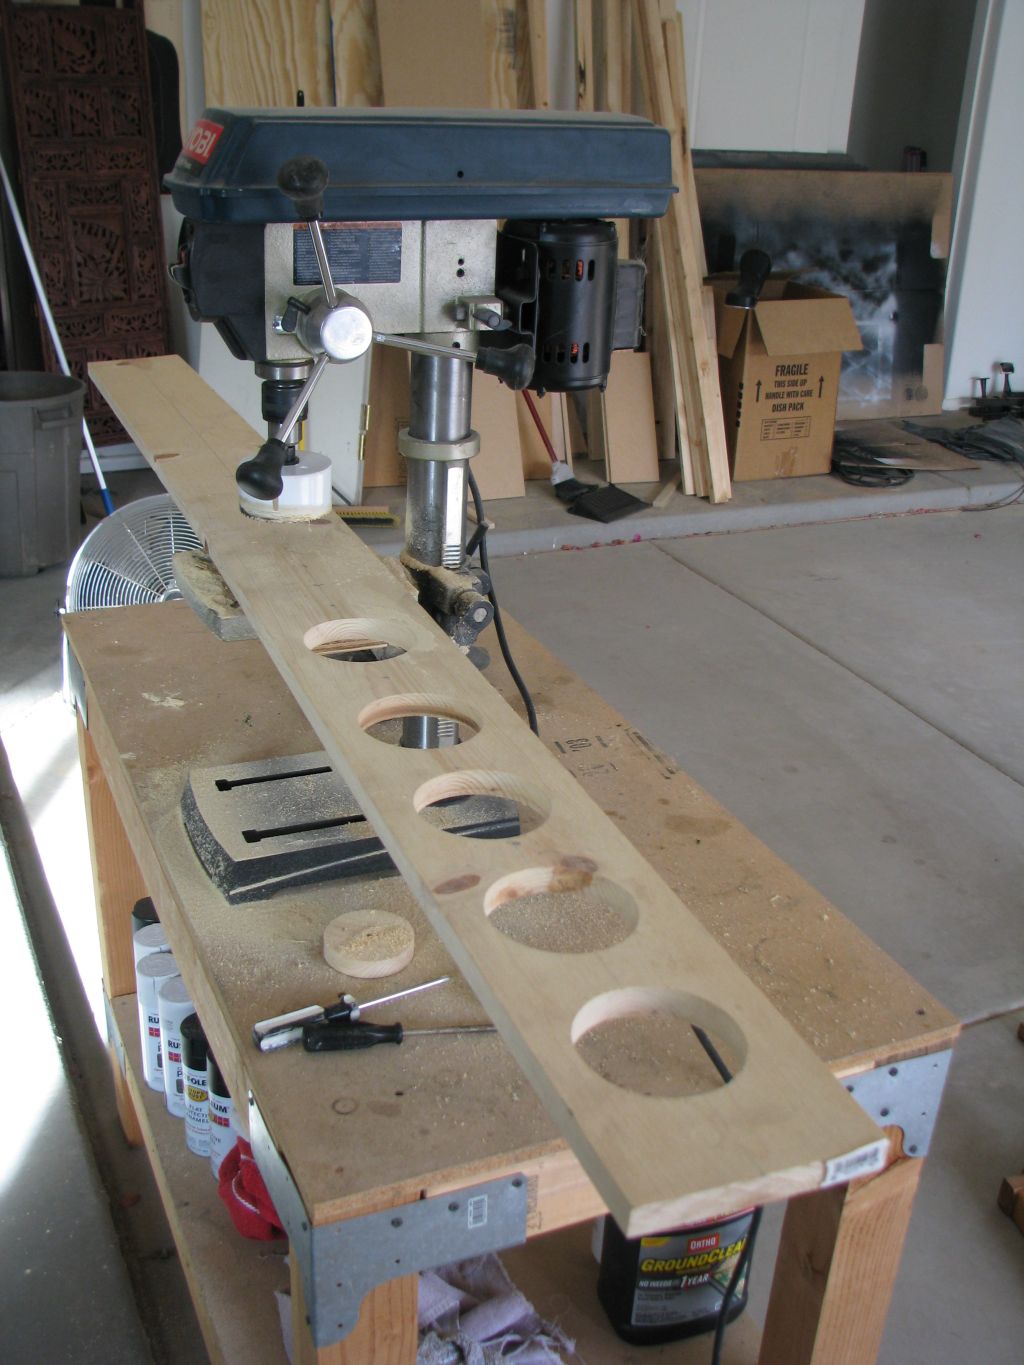
I figured that I could create a similar row for bottles that would accommodate 8 bottles across without breaking from the weight of the bottles. The picture below shows how I cut the large circles to accommodate the body of the bottle. After cutting 8 holes, I saw each board in half, creating two back row pieces.
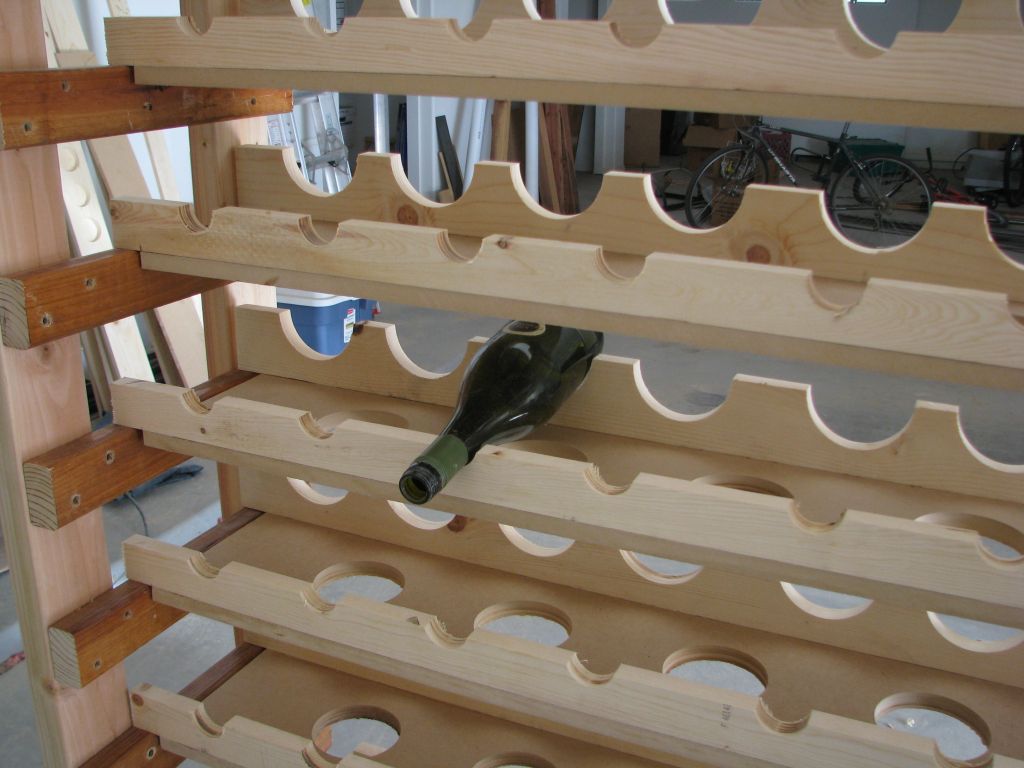
I suspected that the pine that I had decided to use for the neck and body supports was not going to be sturdy enough to accommodate 8 bottles across. Also, although I selected good quality pine, some of the boards were not entirely straight. To solve both problems, I created a shelf component to each row, to which I attached the neck and body rows.
An interesting piece of improvisation and recycling involved the walls of this contraption. I created a double "ladder" that the shelves rest upon. The rungs of the ladder used to be from an actual ladder for a bunk bed that the boys used until they grew too big for the bed. Although the bed ended up getting donated to a family friend, the ladder ended up staying behind until it caught my eye when I was searching for materials for the wine rack.
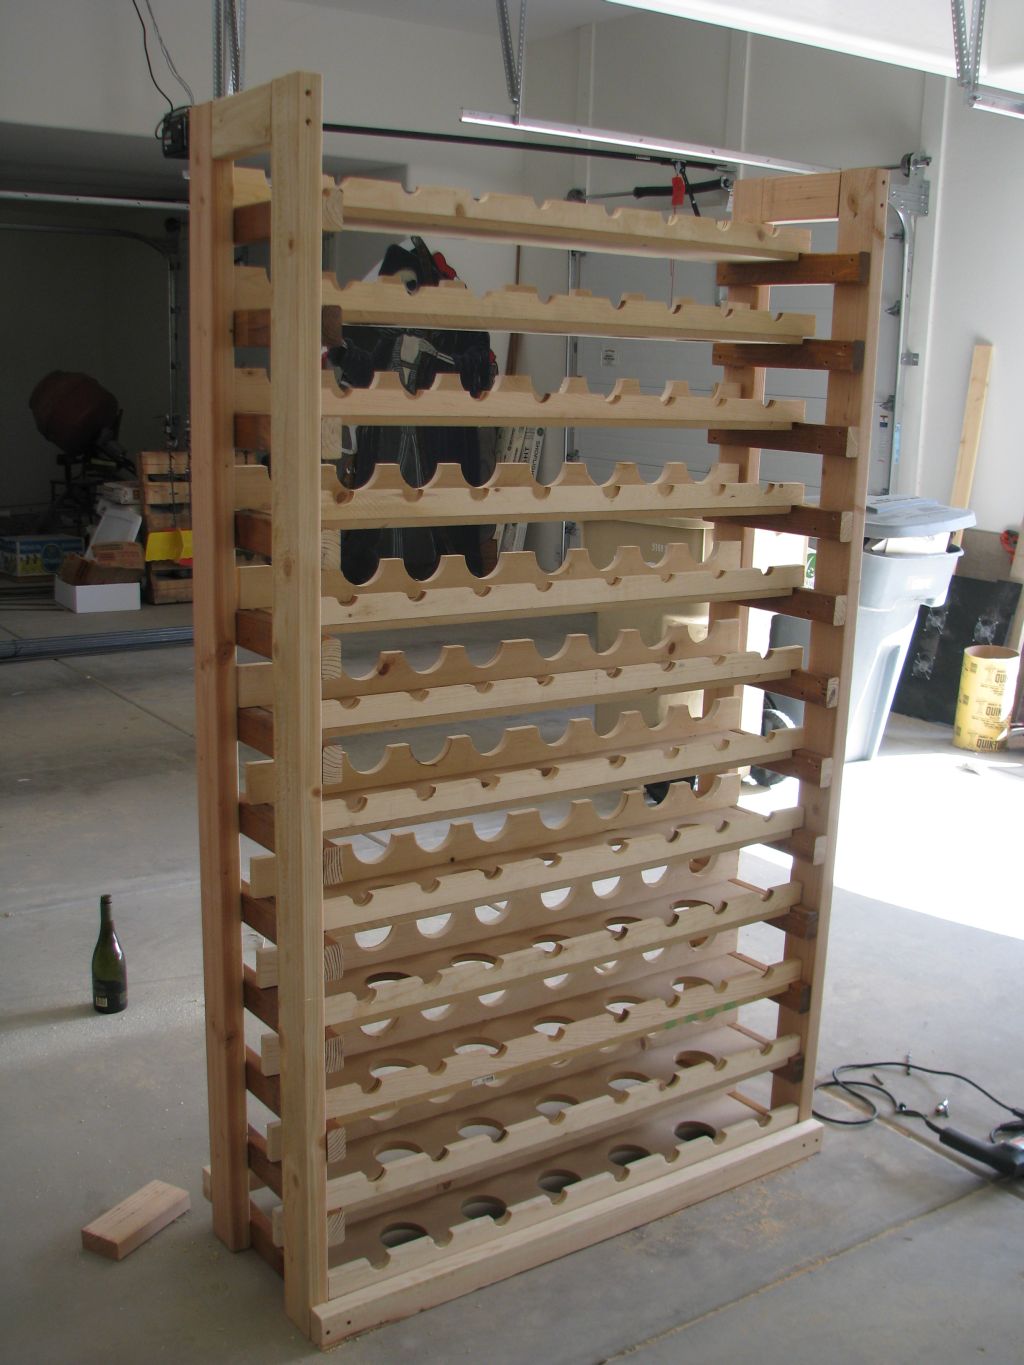
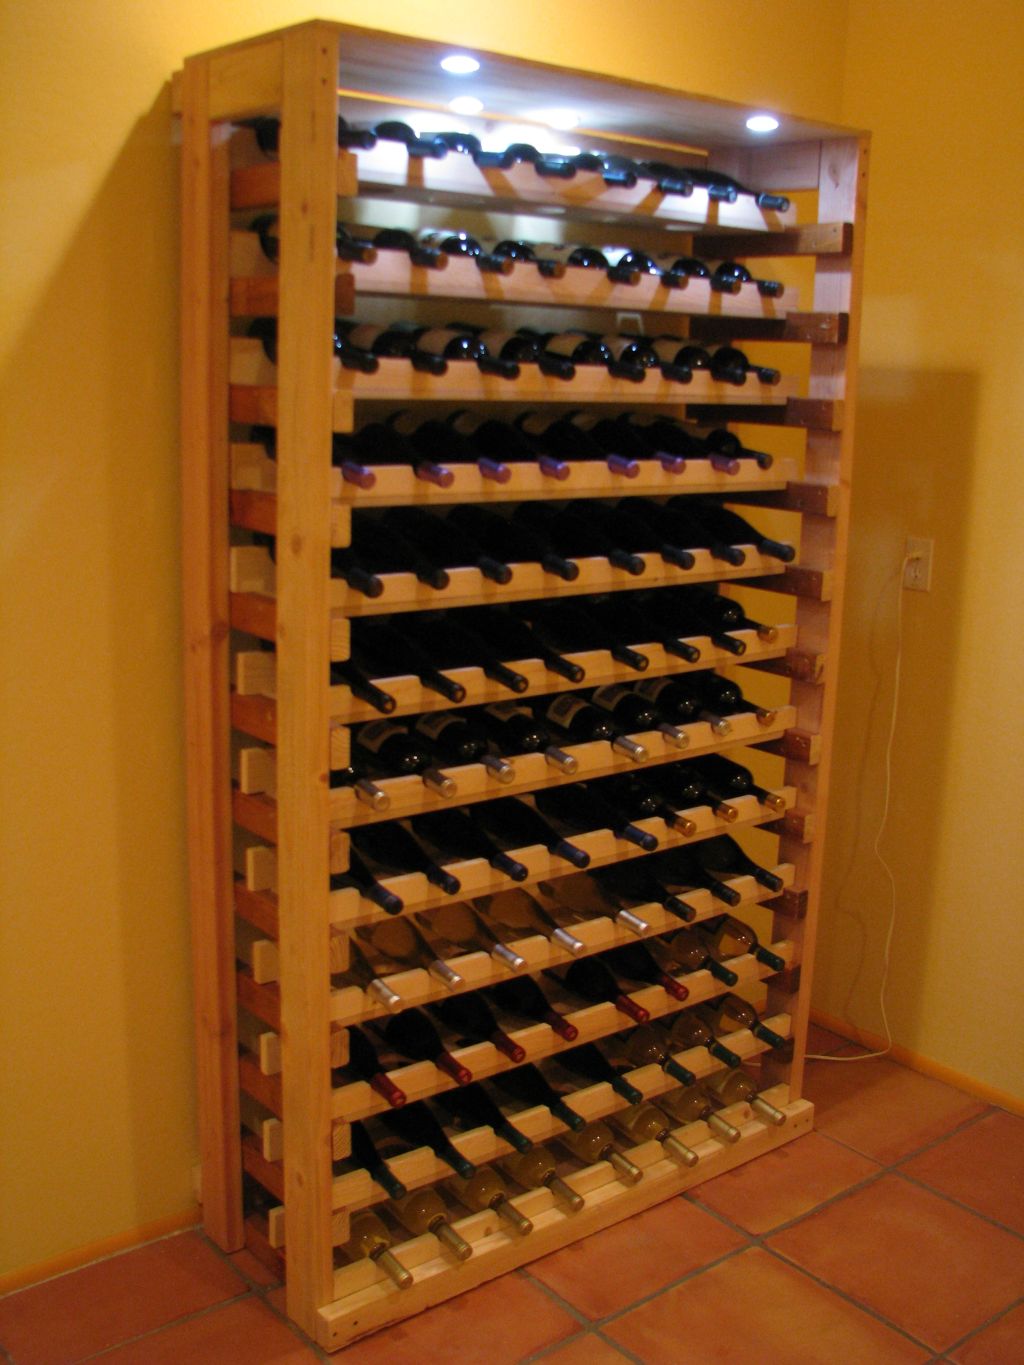
Finally, the project is completed. I installed some Dioder lights that I found at IKEA. The shelves are inset at half-inch increments, from bottom to top, to keep the rack from being top/front heavy. Even with this, I attached the whole unit to the wall. I suspect that at some point, a toddler or cat will attempt to climb it and I would rather it not fall down and crush them.
Next steps: Build another one just like it for the opposite wall, frame the whole room in, and install a room AC unit to keep the wine at a better temperature for wine (55-60 degrees).
We did acquire some "top shelf" wine in February 2009 during a trip to Napa. The reds (e.g., Cabernet, Pino Noir, Zinfindel, etc.) are still somewhat "young" and will improve with age. We bring them up for special occasions. No details on what is in the collection - you will see what is in the rathskeller when you visit.
After our return from Napa, the "top shelf" stuff sat in cases on the floor of the rathskeller for a year. Being the coolest room in the house (between 68-76 degrees), I wasn't too worried about premature aging from the temperature. However, the bottles were sitting in their cases upright, which can dry out the cork and ruin the wine that way. Therefore, I wanted a wine rack that would at least allow the bottles to be safely stored on their sides.
I looked at wine racks online but they were all flimsy, overpriced, and not particularly attractive. The really nice ones were prohibitively expensive. My alternative was to take from the designs that I liked the best and create something truly custom. The design I came up with was practical but had that "old world" French wine cellar look. My inspiration came from a simple combination bottle and wine glass rack that I acquired years ago. We have actually been using it for storing both wine and wine glasses, except for the past couple of months while I've been analyzing it for my new design.
I figured that I could create a similar row for bottles that would accommodate 8 bottles across without breaking from the weight of the bottles. The picture below shows how I cut the large circles to accommodate the body of the bottle. After cutting 8 holes, I saw each board in half, creating two back row pieces.
I suspected that the pine that I had decided to use for the neck and body supports was not going to be sturdy enough to accommodate 8 bottles across. Also, although I selected good quality pine, some of the boards were not entirely straight. To solve both problems, I created a shelf component to each row, to which I attached the neck and body rows.
An interesting piece of improvisation and recycling involved the walls of this contraption. I created a double "ladder" that the shelves rest upon. The rungs of the ladder used to be from an actual ladder for a bunk bed that the boys used until they grew too big for the bed. Although the bed ended up getting donated to a family friend, the ladder ended up staying behind until it caught my eye when I was searching for materials for the wine rack.
Finally, the project is completed. I installed some Dioder lights that I found at IKEA. The shelves are inset at half-inch increments, from bottom to top, to keep the rack from being top/front heavy. Even with this, I attached the whole unit to the wall. I suspect that at some point, a toddler or cat will attempt to climb it and I would rather it not fall down and crush them.
Next steps: Build another one just like it for the opposite wall, frame the whole room in, and install a room AC unit to keep the wine at a better temperature for wine (55-60 degrees).